-
Posts
161 -
Joined
-
Last visited
-
Days Won
51
Content Type
Profiles
Forums
Events
Downloads
Everything posted by MikeC
-
Thanks Gents. Although for full disclosure I should mention that I've used drawing software before, not least Powerpoint (now-fading memories of work!!!) and even dabbled in a CAD package (again, that was for work), so it's more getting used to the particular wrinkles of the Silhouette software than coming at it ab initio.
-
The comet started life as two concentric circles, seen here before final alignment. The tail was then drawn by eye using the polygon tool, with the outer edges as tangents to the inner circle. I used the eraser to get rid of unwanted lines, then grouped it all and added a box.
-
So let's start with the nose art. It's really all done by eyeball estimation, base on the datum that the panel it will sit on is about 0.22" high. I started with the name, "The Comet". "Comet" was started using the text tool again, with a font called "Stencil Gothic BE" which comes with Windows 10. This is not exactly the same, in that the "T" is solid in the font, and needs a cutout. So with apologies to those for whom this is old hat (this software is still a journey of discovery for me): a word created in the text tool can be ungrouped to edit individual letters. So it was a simple matter to magnify the "T", use the eraser tool to make the cut-out, extend the lines on the horizontal and vertical bars to make each a complete rectangle, then group them to make the letter. Then I made sure the letters were the same size, aligned and grouped them. "The" started off in the text tool in Arial font. After ungrouping, the H and E were reduced to about half the height, then the fun began. Using the point edit tool on each letter in turn, I got them to about the right shape; then drew three straight lines to check the alignment and adjusted accordingly. To ensure the lines were parallel I simply drew the first one, then used the duplicate function. Then it was simply a case of drawing two small circles, size and group everything up, draw a box round it all, et voila: I tend to group in stages: so as we saw, the letter of "The" were grouped, as were those for "COMET" Then the dots at each end were grouped; then add "THE"; finally, group that plus the box. Next, the comet itself.
-
To start with, a confession: I'll be using some small decals for the six kill markings, as I'm not that confident about cutting things that small. The lettering and numbering was simple enough: I produced them in the text tool using a font called USAAC Code, which a fellow IPMS branch member pointed me at. The serials are 8" high, and the codes 24". (Incidentally, I make no apology for using Imperial units - I can use SI units equally well, but the original was measured in Imperial units, and I'm modelling it in a scale based on said units, so it makes life a lot easier. I'll include metric conversions if there's a popular demand.) The national markings will be done using dashotgun's file from this forum, and the invasion stripes will be masked the old-fashioned way with Tamiya tape. What I intend to deal with here are the nose art and the checks.
-
I'm doing a Revell P-51D-5 as part of a Group Build over on the Large Scale Planes forum https://forum.largescaleplanes.com/index.php?/topic/90601-p-51d-5na/ I specifically picked a subject, and a reserve, that I considered I would be able to do with masks. My first choice is 44-13471, 6N*J, "The Comet" of the 505th FS, 339th FG, assigned to Capt Evan M. "Johnny" Johnson. This has a name, a nose art I felt I could draw in the Silhouette software, red/white nose checks, and best of all (for me) full D-Day stripes. I don't intend to repeat on here all I've posted there, but thought I could expand the masking-specific bits here for anyone who's interested. My reserve is for the event that I fail to manage the nose checks, and has just a name: 44-13708, B7*I, "Duchess of Manhattan" of the 374th FS, 361st FG, Bottisham. I have a certain fondness for Bottisham, I may even have to invest in a second kit and do that one! So without further ado, here we go.
-
Looks fine to me. I'll have a look for that FB group, thanks for the heads-up. [Edit] It seems I'm already a member of that one, there are so many FB groups I lose track. I'm actually doing mine over on LSP for the Revell GB, I'm planning to put some of the mask-specific stuff over here as well. https://forum.largescaleplanes.com/index.php?/topic/90601-p-51d-5na/
-
A bit late for me to say this Mathieu, but and what a great intro. I was particularly struck by the P-51D-5 with the green and yellow checks, "Big Beautiful Doll" #1, as I'm currently working on getting such a nose band right for a 339th FG machine.
-
As one does ...
- 23 replies
-
- 1
-

-
- 1/32 scale
- resin/white metal
-
(and 1 more)
Tagged with:
-
Lovely work, and a great choice of scheme .
- 23 replies
-
- 1/32 scale
- resin/white metal
-
(and 1 more)
Tagged with:
-
Thanks Kev, good to see the forum growing.
-
And finished. I'll do some proper photos in due course. It just fits in the IKEA display cabinet: turn it port quarter to the front and the door causes the pitot to bend a little.
-
Aaww, Max, thank you, although I should point out that whilst new to cutting I've used one or two commercial masks before. @WoodyV, . I think masks are very rewarding, and I've been painting things like walkways and invasion stripes, rather than use decals for these, for years. But having one's own cutter allows you to take things to a whole new level. In my modelling, I like to have, above all else, a subject that nobody else has done if I can. That is so much more within my reach now. The software? It's taking me a while to find my way around and get used to its particular quirks and wrinkles, but it's straightforward enough: if you can draw with MS Powerpoint you'll already be familiar with many of the concepts like group/ungroup. Once you have a design, cutting it is no different to sending a document to a printer - assuming you have your media loaded correctly https://www.scalemodelpaintmasks.com/index.php?/topic/566-portrait-3-will-not-cut-problem-solved/ Enjoy, and do please let's see some of your output in due course.
-
That's better. On to the finish line.
-
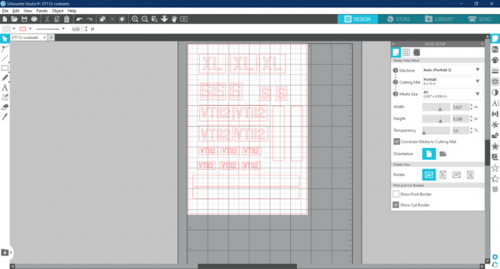
View File VT112-codesetc.studio3 1/32 scale code letters and serials for Meteor F4 VT112/XL-S of 226 Operational Conversion Unit (OCU), RAF Bentwaters, post-WWII. Designed for HKM kit. Includes one or more spares of each code/code pair, and some strips to use for transfer tape a/r. Submitter MikeC Submitted 08/22/2021 Category Specific Aircraft
-
-
When you use decals, you can see the model gradually, slowly evolving - hopefully into what you'd envisaged - as you work. The gratifying thing about using the masks is that it's a bit quicker: you add lots of masking and do a bit of painting, and nothing seems to happen Then suddenly, seemingly in an instant, the masks come off, et voila! OK, the walkway lines are a little uneven in width, but I can live with that. What I can't live with (although I did seriously consider it) is that the starboard "S" is noticeably above where it should be. I've no idea how that happened, I blame the bench gremlins. Now I'm particularly glad I included a spare on the mask sheet. So not 10 minutes after the big reveal, it was out with a fine sanding stick, off with the "S", and a quick touch-up of the silver; the new S goes on next session when the touch-up's cured.
-
I uploaded a file of Meteor roundels and walkways a little while ago. And here's the Meteor with the roundels painted - apologies for the "quick'n'dirty" photo. With hindsight, I would have traced and done the fin flash with the Silhouette as well; as it was, I used Tamiya tape and it was probably a lot more work. One more colour to do, ie black for the unit codes, serials and walkways. I'm doing VT112/XL-S of 226 OCU, a fighter training unit based at RAF Bentwaters in the immediate post-war years. (As an aside, they also operated a few Tempest IIs, and my SH example is earmarked for XL-Y.) Thanks for looking.
-
That's a fair point Max. I hope we would be able to leave it up to members to follow the spirit of this forum without a lot of detailed rules.
-
Great idea. I for one would not wish to see a whole build log ruled out. Depending on the subject the masking process may come at a number of places in the build process. For example, biplanes tend to be painted before the airframe as a whole is complete. Even on more modern subjects it may be advantageous to complete part of the masking/painting process at an earlier stage: perhaps an aeroplane with a complex scheme, like a "special" tail fin or a tiger jet. It will give more context to the masking element if the steps either side can be shown. So I'd also argue for allowing members to post whatever stages of their builds they see fit, from a couple of masks at the painting stage to a full build log, but clearly with the masking/painting process showcased/highlighted/emphasised.
-
Many thanks Kev; now uploaded to the original thread. The second thread has been reported with a request to delete. My apologies to you for causing extra work, also you and anyone else if this has caused confusion. I'm off to find some sackcloth and ashes ...
-
Possibly a silly question Kev, but how does one do this? I've just updated my Meteor roundels & walkways file, and it's created a whole new thread. Did I miss something obvious?
-
Version 1.0.1 uploaded.
-
That sounds like a good plan Kev.
-
That did occur to me Max, but Silhouette have come back to me again. It seems the only thing defective was my understanding!! In particular, my understanding of where to load the cutting mat. The manual says to align on the blue mark: there is no blue mark on the Portrait 3, so I guessed as best I could. Of course, I was using the wrong mark to align the cutting mat, and had it too far to the left. This meant that when the job started the autoblade reset to zero, and was then prevented by the cutting mat from setting to the required depth. To paraphrase Col Jessop (Jack Nicholson) in A Few Good Men: "Well, do I feel a complete fool!!" Anyway, my thanks to everyone who has taken an interest and helped in solving the issue, particularly Max and anyone else who has downloaded the file (which I have just cut as well); and to Thomas at Silhouette's technical support. In particular, Thomas pointed me at this video, which was exactly what I needed to see. Joking aside, clearly I've learnt something, and if this thread helps another novice in the black art of mask-cutting, it's worth the price of a little embarrassment on my part.


