Leaderboard
Popular Content
Showing content with the highest reputation on 07/27/2020 in all areas
-
Yes, me too! Although I dont have that many airliner kits atm, (2 atm to be exact) I really love some of the airliner schemes. All the decals, such as the All Blacks 1/1/44th 777 I got have full carrier around the designs, so a cutter would seem very appropriate there.2 points
-
At the moment, I have a 1/72 P-40, that I am finishing in a RAAF colour scheme, a 1/32 Spitfire VIII in RAAF Grey Nurse scheme and slowly working on a 1/72 Super Constellation refurbishment. Which will eventually look like the airworthy “Connie” that is at the HARS museum down south from where I live.2 points
-
I originally built this model some time in the early '90s, after just getting back into the hobby from a long layoff. In 2007, I decided to rebuild it rather than toss it out, and can actually present before and after photos! Here it is as originally built and painted, prior to being disassembled for the rebuild (apologies for the crappy photo): And after several months' work, which featured lots of scratchbuilding and a complete rescribe, here's the renovated result: Needless to say, all the markings, save for the tail number and a few stencils, were painted on using hand-cut masks (this was long before consumer-level craft cutters had become commonplace). Still one of my most enjoyable builds! Kev1 point
-
KH North American T-6 1/32 scale finished as Harvard III. All markings, canopy masks and walkways via Silhouette Cameo 2 + Designer edition software. The (inner) middle canopy section was also cut with the cameo from ten thou plastic card. Max1 point
-
husband, father, Balloon Ground Crew, RFS Volunteer, AvGeek, Model builder, Aviation/Astrophotographer Mmmm🤔 Yeah, I think will about some it.1 point
-
So I've had a Cameo 1 for a couple of years but only used it to a relatively small degree. I have the full boat of software up to and including the business edition (mainly so I could import AI images. Thanks to Kevin we can share our knowledge and experiences with these contraptions.1 point
-
Hello everyone, Newbie with home made masks, my new silhouette portrait is on his way. My favorites kits are figures, afv, aircrafts and some cars. Go go gooooo.1 point
-
Howdy everyone, another LSPer here! I'm an aircraft mechanic during the day, and after seeing the results guys were getting with paint masks, I thought I could apply the technique to full sized aircraft. The shop I worked at did a lot of high end avionics upgrades, and the need for unique stencils and placards allowed me to convince the boss to buy a Cameo III for that purpose. Since It was my idea, I got tasked with learning and putting it to use. Here are a few results. This is a circuit breaker panel from a Cessna 172 An entire brand new panel for a Piper Commanche 4001 point
-
One of the skills, perhaps considerations might be a more accurate word that I’ve learned over the years that I’ve been using my cutter, is how to efficiently draw the designs. My favourite “buttons” on the top tool bar are “copy” (Ctrl +C), “paste” (Ctrl +V), “Object” - the drop down menu enables a mirror or flip function, and “Group/Ungroup” (Ctrl+Shift) which enables you to select drawn lines/shapes and group them as one entity. Being familiar with these few keys gives you the ability to be able to draw shapes quickly and accurately and to make the best use of the design software. I am by no means whatsoever claiming to be an expert with these things, more a functional user using what I have found works for me and if I can pass on a few of these tips then I’ll be happy! I love the challenge of having a new set of masks to draw then planning how to go about it. I spent an hour or so yesterday drawing some masks for my Lightning so I’ll add to this thread a little later with some pointers about how I did them. Watch this space......😀 Max1 point
-
Thanks. Yeah, Have used the silhouette Cameo 1 in the past but never have been successful in getting decent cuts with it. A few years ago Brother introduced the ScannCut CM550 in SA and my wife and I Decided to get one after seeing a demo at a local hobby expo. There is also a lot more support for Brother products than silhouette products currently in SA. For us it was the best move ever. Find it more user friendly than the Cameo 1 at that stage, and was getting much better cuts on vinyl and masking tape. We recently upgraded to newer Scanncut SDX1200(Sdx125 in the states) which is much better than the old CM550. My wife uses to cut vinyl as a small business for herself A nice feature I have used in the past is the scanning option build it in the cutter, Scan something and cut directly. Also a nice feature is that it can scan in the mat with your cutting material and you can place your cuts exactly where you want them. Brother has Canvas Workspace to design on the PC, But I went aftermarket and found Sure cuts a Lot(SCAL). A lot more user friendly than the brother software and it supports various cutters including silhouette. The only drawback for the Brother machines is that the cuts must be saved on a USB stick, or to cut send directly to the cutter via WIFI you must use Canvas workspace. With SCAL can most of the designs, but when I wanted to some very complicated I had to use Inkscape, save as a SVG and then import to SCAL. Earlier this year I found Affinity Designer and now replaced Inkscape with this software and doing most of my designs in there and then send to SCAL to finish up. SCAL is great for what my wife does on her side.1 point
-
I don't have all that many right now either, having sold off several before I moved a few years back, but I did retain a 1:100 L-1011, 1:144 767 and a few others. I'll also eventually be adding a 1:100 DC-9, and a couple of 1:144 L-1011 kits. possibly a 777 too.1 point
-
Thanks Brian, I tried to write it from my point of view when I was a beginner, I hope to works for people in that position!1 point
-
1 point
-
1 point
-
Bit of a grand name for it Kev, but I hope it's helpful as a starting point for new users. It still forms the basis for all that I do with my cutter. I thought I might add a screen shot of the main tools that I've been referring to, without getting too technical - cos I get lost very quickly with techie-lingo!1 point
-
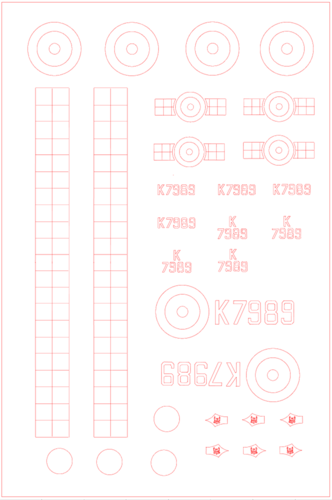
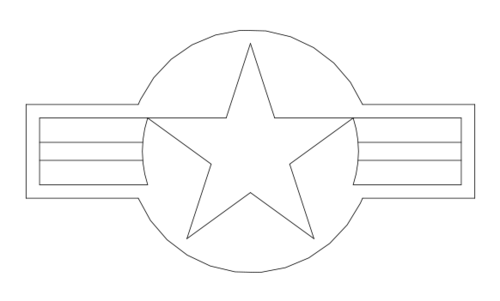
So these are the masks that I drew for the Lightning, all in 1/32 scale. Firstly it's worth saying that I draw everything with the page really enlarged so that the positions, points and edges of my lines are as precise as possible. You can reduce the page size to check every now and again. My starting point was the sheet of markings provided with the kit, I measured the diameters of each part of the largest roundels then selected the circle tool from the left hand selection box - it doesn't actually draw circles per se though. The latest update to the software includes a centring cross to everything you draw, it's so useful for alignment purposes. See below for the main tools in this article: I drew the inner circle, noting the distances shown on the x and y axes as I drew it, making sure they were the same! I changed to the "edit" or "move" tool at the top of the left hand selection and dragged the circle so it was centred on a grid. Then I copied it and pasted another circle, dragged it out to the required size and centred it over the first one. I then repeated this operation for the largest circle. To group these three, press and hold "Cmd" + Shift then click on the "Group" icon on the top bar. The roundel should now move as a whole design. To do the smaller roundels it's simply a matter of copying the first one then scaling down to the required size. For the nose art I was lucky that the roundel was the same size as the underwing one. The original transfer sheet had a chequer design which again I measured; 6mm squares. I reset the grid settings* to that size which helped with line length. Once I'd drawn the first 24mm horizontal I copied and pasted two more, then dragged and spaced 6mm apart vertically, lined up on the first one. Next was a 12mm vertical, again copied and pasted three times then dragged to position which gave me the main longer chequerboard design. Again, group this as a unit. One little complication is that the edge next to the roundel has a slight curve on it to "fit with" the curve of the roundel, though spaced from it. To achieve this I moved the correct roundel into approximately the right place, then copied and enlarged another roundel so that part of its circumference looked right over the "mating" edge of the chequers. Then I used the eraser tool to get rid of the rest of the large circle and cleaned up the other edges. Note, if you erase any part of a grouped design, it automatically ungroups the whole lot, so you have to go over it all and re-group. *Note: you can select "Snap to grid" but I haven't found this at all useful, I prefer the control I get with "freehand" drawing. Once this was done I copied the chequer, went up to "Object" on the top menu bar, selected "mirror" + "horizontal" so I had both sides. One of course was too long so I ungrouped this, reduced the size of the horizontals (either with the eraser or by grabbing the handles and moving) and cut out (Cmd + X) the unwanted verticals. That just left the fin flash colours, a couple of words of caution in this little bit! To get the angle right so the flash aligned with the front edge of the fin, I scanned a drawing from the instructions and saved it to my photos. With the Designer edition (but not the basic one) you can then simply drag the picture onto your drawing screen; it effectively "sits" on top off what you've already drawn. You'll undoubtedly need to reduce it to a workable size and then before you can draw "on top of it", ie trace it, you go to the top bar where, next to the Ungroup icon (see above) are some more little juxtaposed squares. Click on the one that has Alt text saying "Send to the back", this brings your drawing to the front so you can draw lines over the picture! Clever stuff!! 😃 I drew a line about a third of the length of the front edge of the fin, then a horizontal about the width of the three stripes, all approximate because I have no set dimensions so it's Mk 1 eyeball stuff. I copied the horizontal line and dragged it to the bottom, then copied the sloping first line thrice and spaced them according. Click on all and group. As before, once you've got one, copy, go to "Object - mirror - horizontal" done! Word of warning through bitter experience! DO NOT HIT THE "Save" BUTTON ON YOUR DRAWING WHILST THE PICTURE IS UNDERNEATH IT! If you do, you will have saved the whole lot together and I don't think you can "unstick" it? So do your design, move the picture well out of the way, then hit Save. And that was that really. Just about as basic as you can get, but it works.1 point
-
Thanks, Thomas. I'll amend the descriptions for the relevant categories so that they explicitly mention codes and serials. Kev1 point
-
Hey Brian, did you do these before Rowan did the decal sheet, or was this done to correct the stars he provides which are smaller and farther out from the axle? Thanks for posting :)1 point
-
Thanks for your impressions, Max. We've just had a new member join who is a Cricut user, so I'm hoping he'll share his experiences and perspectives on the brand. I'd also like for us to be able to publish some hardware reviews and evaluations at some point. Kev1 point
-
1 point
-
1 point
-
1 point
-
1 point
-
Nice one, Brian. I need to update the submission form to include kit and scale details when they're appropriate. Just not sure if we'll be able to retrospectively apply that data. Kev1 point
-
After that, I played around with different designs, making some stickers for various applications. Stickers on my car Laptop I've since moved on from that job, so I'll be buying a Cameo IV to cut the masks for the 1/32 ME110 thats half built on my bench! Super excited to see what you guys all come up with 😁 Denzil1 point



.jpg.c5cb30f08408b2d1a8772e75071e8091.thumb.jpg.b269d3f88cea21c3dc4bc025ac115108.jpg)

