
MikeC
-
Joined
-
Last visited
Posts posted by MikeC
-
-
Suddenly it's coming together and starting to look as it should. Today I matted down the nose checks and redid the anti-glare panel which had suffered some overspray at some point. Then I added Capt Johnson's scoreboard using a Kits World set of generic kill markings; mended the tailwheel which broke earlier in the build (but nothing superglue and a pin couldn't fix); removed the windscreen masks plus the kit canopy which was being used to mask the cockpit (so it wasn't completely useless after all
") ); and added the Quickboost exhausts.
); and added the Quickboost exhausts.
Sometimes you just get one of those kits that fight you all the way, but (touch wood) it's very nearly the last lap!
-
 2
2
-
-
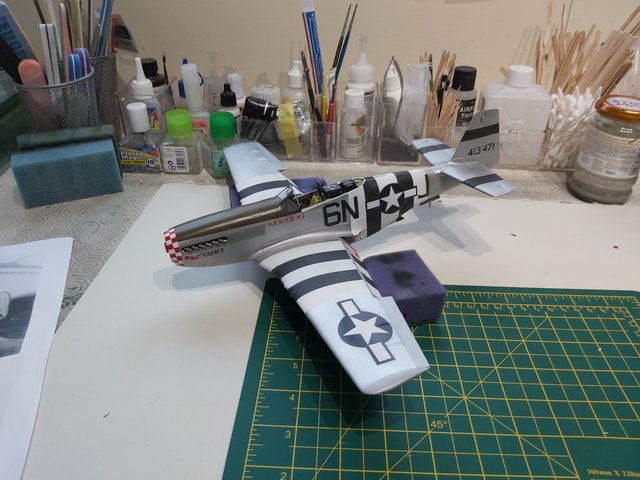
I'm back. Funny thing, I failed to get this over the line in the GB on LSP, so a lot of pressure was off and I felt I wanted to get back to it.
I've been doing the nose masking and painting. In the end I applied all the checks individually, one by one, then removed the pieces where the red was going to go. It was a slow process, but in the end I felt it was the best way to align them correctly. I was quite gratified by the way they fitted: all those endless test cuts/fittings with paper paid off.
.jpg)
.jpg)
Btw, that purple stuff is liquid mask.
And although I picked up a pot of Tamiya gloss red by mistake (the gloss and matt are X7 and XF7 respectively), I was reasonably happy with the result - nothing a coat of matt varnish won't fix. There were several areas where the small masks were not quite tacked down properly, so a bit of delicate brush-work was needed on some squares.
.jpg)
.jpg)
.jpg)
Still by no means perfect, but as always the camera magnifies any errors: it looks a lot better in real life than it does here (honest!). So in the interests of finishing this bird (and the interests of my sanity) I'm going to accept it as is.
-
3
-
-
On 2/26/2022 at 3:11 PM, Mozart said:
Agreed entirely about stencils, there's no way the Silhouette cutter nor the vinyl can handle such small letters and numbers, but gun ports I would cut out of thin paper and secure with Gator glue or similar. That way you can control the shape, size and colour of the patch.
Max
Never thought of that, perhaps I'll give it a go.
-
This may seem an odd topic for a forum dedicated to paint masks, but bear with me please.
I take it that most, if not all, of us here are interested in masking and painting markings because we believe (rightly imo) that it give a better representation of a real aircraft's markings, and we enjoy the process (or we wouldn't do it). But thinking about a Spitfire I'm just embarking on, it occurred to me that the red-doped fabric patches over the gun ports are better represented by decals. The real thing was a doped fabric patch, so the decal is actually better at representing that; and a decal will shrink slightly as it dries (particularly if setting solutions are used) and thus settle into the gun port - again, like the real thing.
This made me think about other occasions when decals may be preferable to masks, and I can think of three:
- As above, Spitfire gun ports: and many other types, of course;
-
Where you have to, such as:
- Very small markings like data stencils - often these are decals irl anyway, I've even seen them with 1:1 silvering;
- Complex markings like unit badges which are beyond the capability of the cutting machine or the modeller (without intending to be derogatory to anyone);
- Dayglo strips on RAF trainers in the 1960s-70s scheme: these were adhesive strips (like Fablon) irl, and thus a decal will represent their slight thickness better.
Can anyone think of any more?
-
1
-
14 hours ago, Mozart said:
Always a good idea Mike when you lose the will on one model, you’ll get back to it later. I’m hoping the Lancaster when it arrives will re-kindle my enthusiasm for bench time, but painting and website updates have kept me occupied in the meantime!
Thanks Max, I'm hoping so. It's so very nearly at the end, but to achieve a finish (taking into account the probability of at least one more setback) would have meant rushing it. I had enough of deadlines when I was at work, I try to avoid them these days.
I've been following your Lanc painting on FB, looks really great.
-
1
-
 1
1
-
-
Edited by MikeC
On 2/17/2022 at 9:09 AM, Mozart said:One square at a time is the only way that’s worked for me Mike!
Indeed, that seems to be the only way Max. But it's slow.
However, I'm afraid there comes a time when a model can turn into a bit of a chore rather than a pleasure, and that time has been reached with this: I never thought I'd get there with a Mustang, but here I am. So I'm shelving this for a little while, and switching to something else for the moment. But the Comet will be back eventually.
-
1
-
 2
2
-
-
On 2/14/2022 at 7:14 AM, Mozart said:
Ah, chequers! Good luck with that Mike, I’ll be interested to see how you tackle that.
Thanks Max.
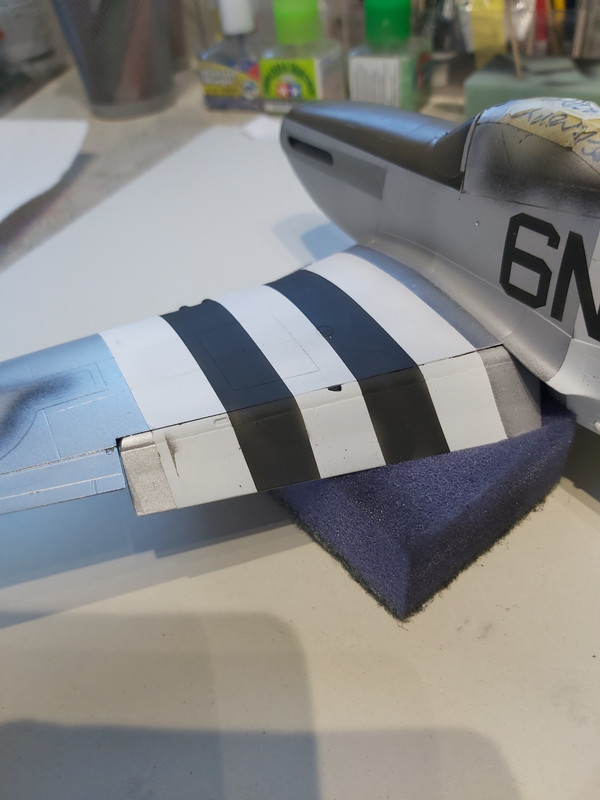
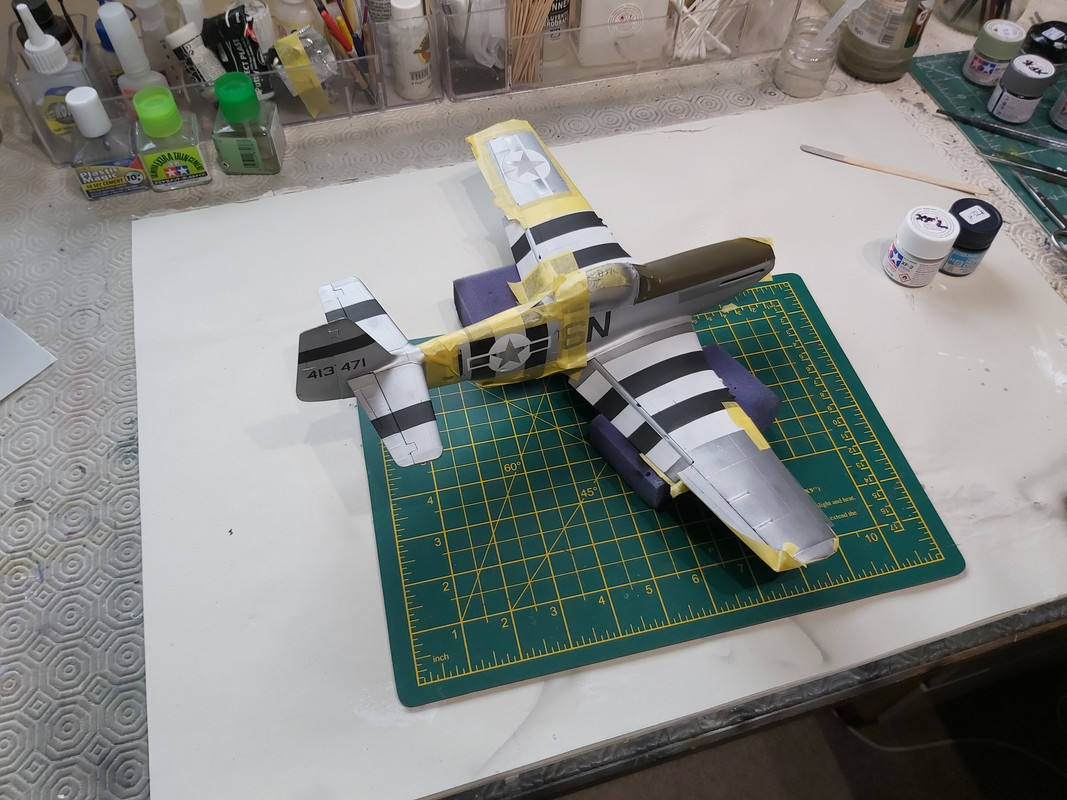
The first job was to unmask the white I painted earlier, and mask behind it, then do a topcoat of white. Don't worry, there is a band of Artool Ultramask in front of the Tamiya tape.
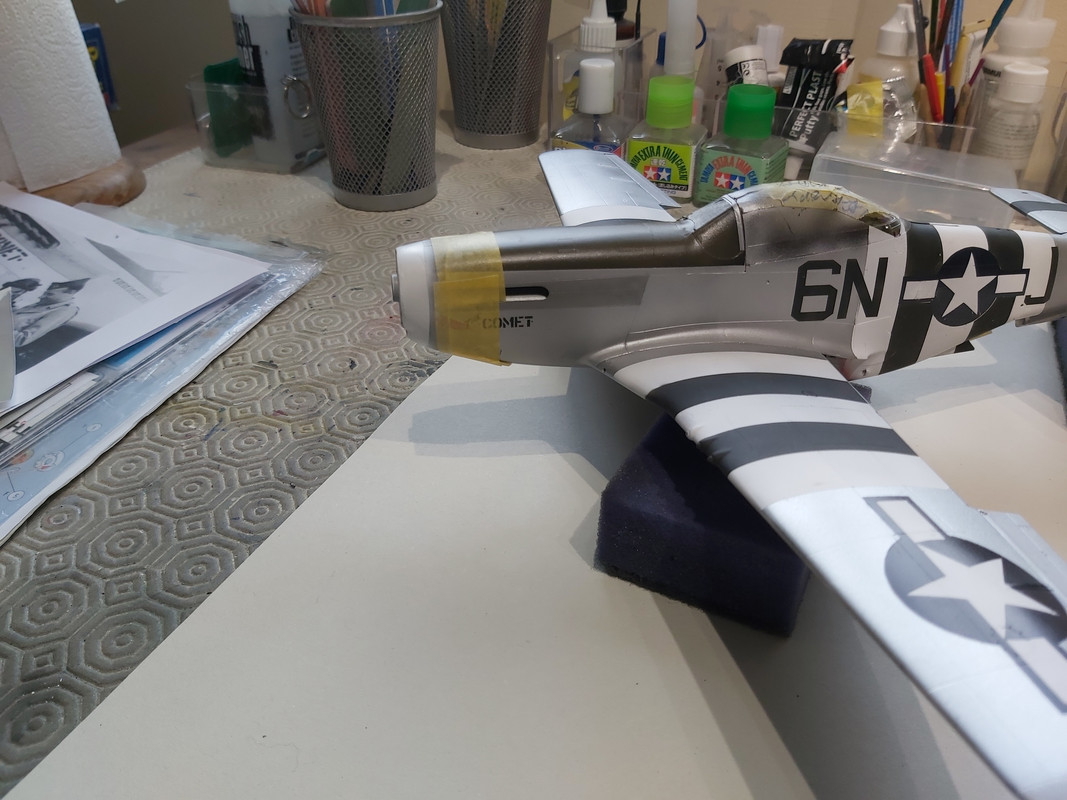
The next job will be masking out the checks to be left white. I'm not sure how I'm going to tackle that other than one check at a time, but perhaps I'll think of something: any suggestions welcome. I have two masks for the checks, each one for half the nose. I'm dubious about trying to pick up a whole set in one go, I tried it earlier and it didn't go well as the transfer tape didn't pick up a complete set.
Incidentally, for once I'm a little disappointed I did a good job on the upper nose seam: I'll need to identify the centreline of the fuselage, and even a trace of a seam would have been helpful.
-
3
-
-
-
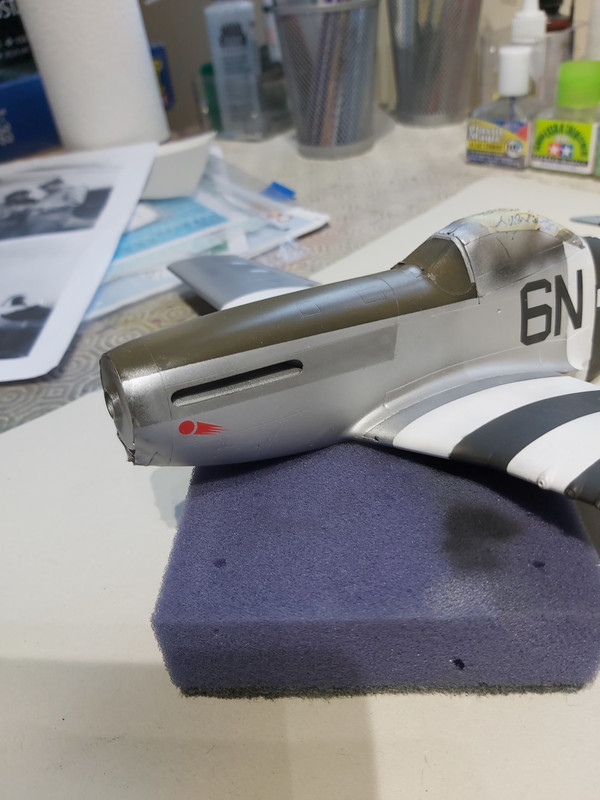
Anyway, no problems with the wording on the nose art.
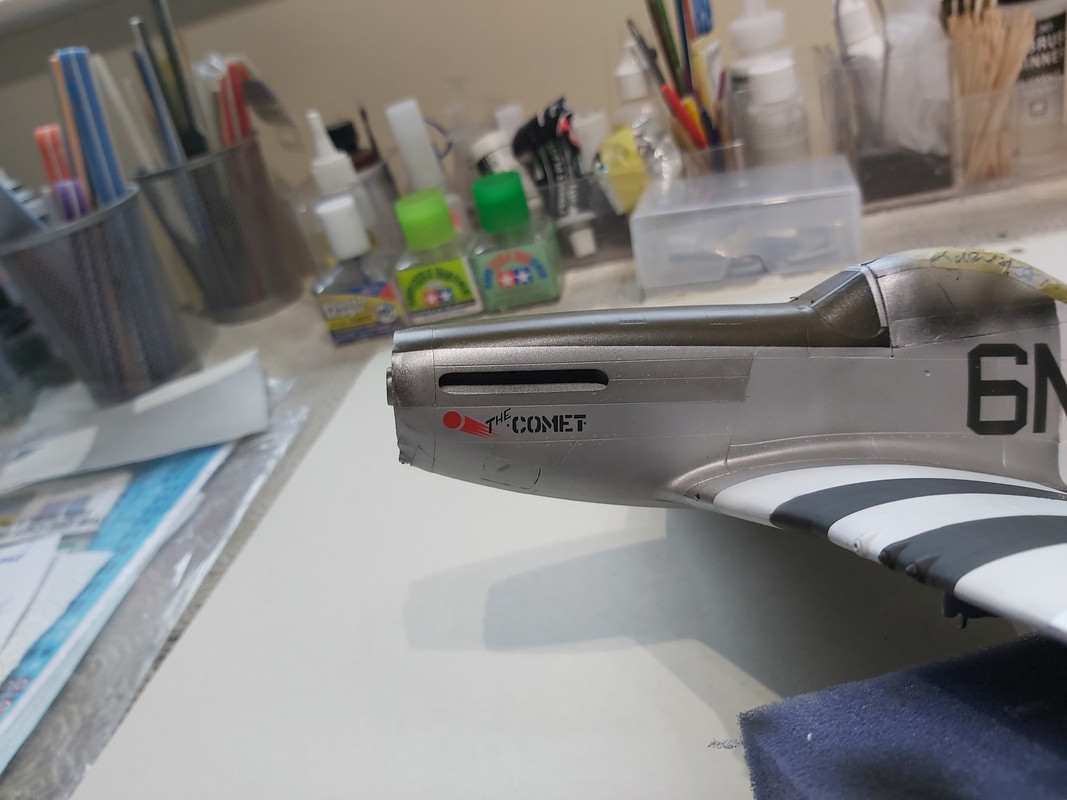
Though I say it myself, that doesn't look far out.
http://www.littlefriends.co.uk/wp-content/groupimages/gallery/339g/6n-j1.jpg
The last major painting job is the chequered nose band, and I'm going to rest it a day of three before tackling that.
Thanks for all the kind words and encouragement so far.
-
4
-
-
6 hours ago, Mozart said:
This is a great thread Mike! It’s so easy to get the impression with a finished model that all went supremely, faultlessly well. I’ve never achieved it, and I applaud you for showing the common “whoopsies” that can occur during the masking/painting process.
MaxThanks Max. You're so right, there are so many masterpieces on the fora and at shows, and very few people seem to admit they've had a problem or two. I suspect that's not mere vanity, but a natural feeling that one's probably the only person who has had such problems (that way lies discouragement), and a hope that no-one notices; or perhaps not wanting to bore people with "rookie" mistakes.
-
1
-
-
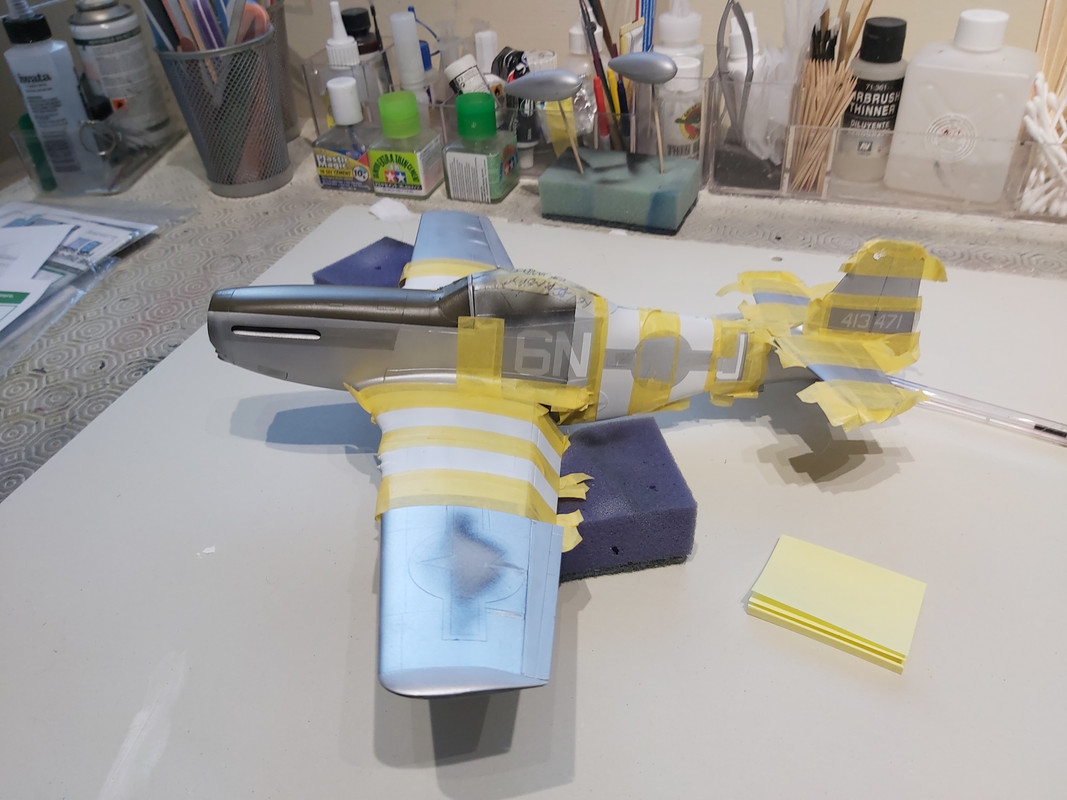
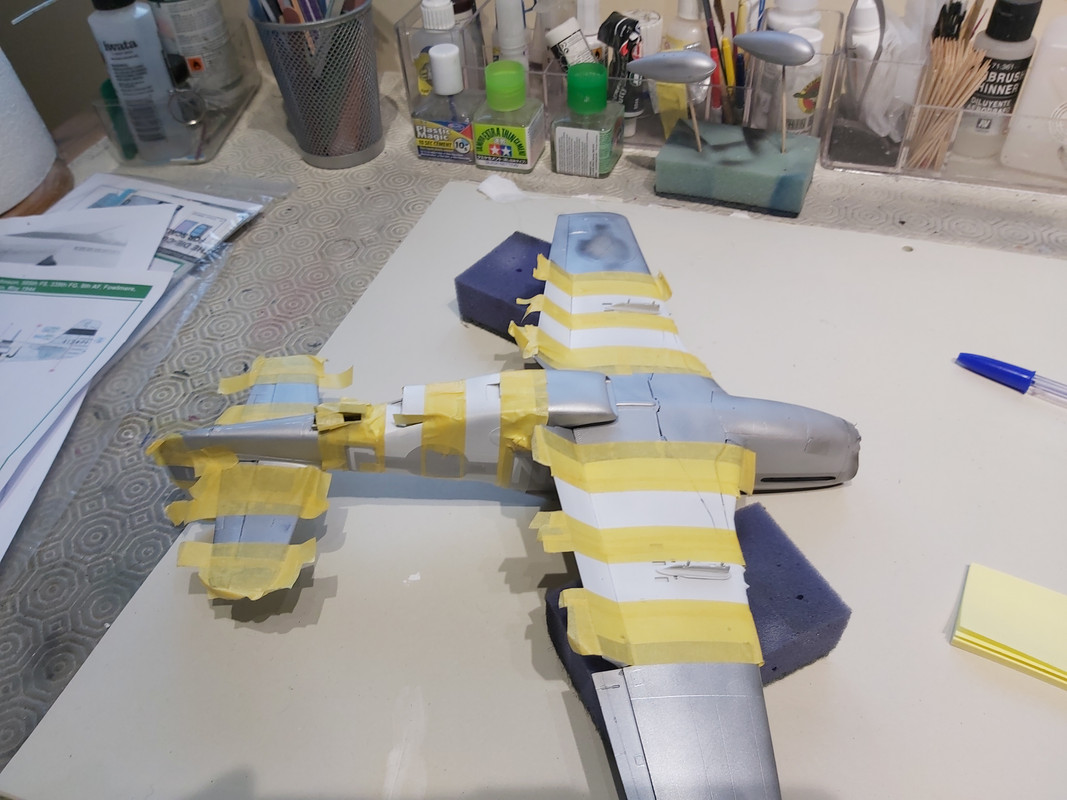
Some more progress: slow but steady, and occasionally some negative progress. The learning point from this is that when masking with lots of tape, make sure the boundaries between pieces of tape are complete, the tape is overlapped and fully stuck down.
Next learning point: the bomb/tank racks remained natural metal so I should've left them off until after painting. And I thought that after 50+ years I was starting to get the hang of this modelling lark!
A few scratches on the "6" to sort out!
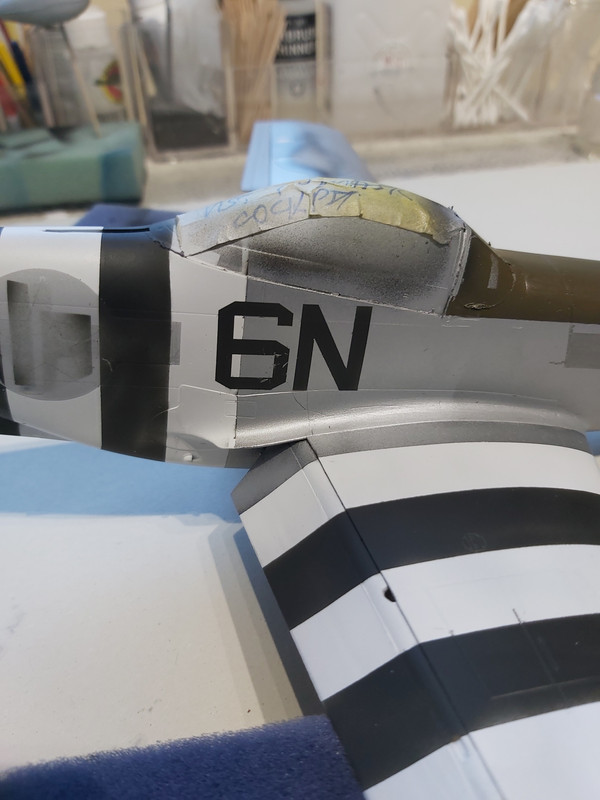
So I sorted that lot out, and painted the bits of the flap that hide under the wing skin when they're up, and after letting it all cure, masked up for the insignia blue.
Then painted that, and did the first part of the nose art.
-
3
-
-
On 2/7/2022 at 4:05 PM, GeneK said:
Mike,
I can't view your pictures from earlier in this thread (2021) -- have you changed servers? Any chance of getting the pictures back?
Gene K
I've not changed anything Gene, all the pics are in the same sub-folder on Postimages. Have you tried using an alternative browser?
-
-
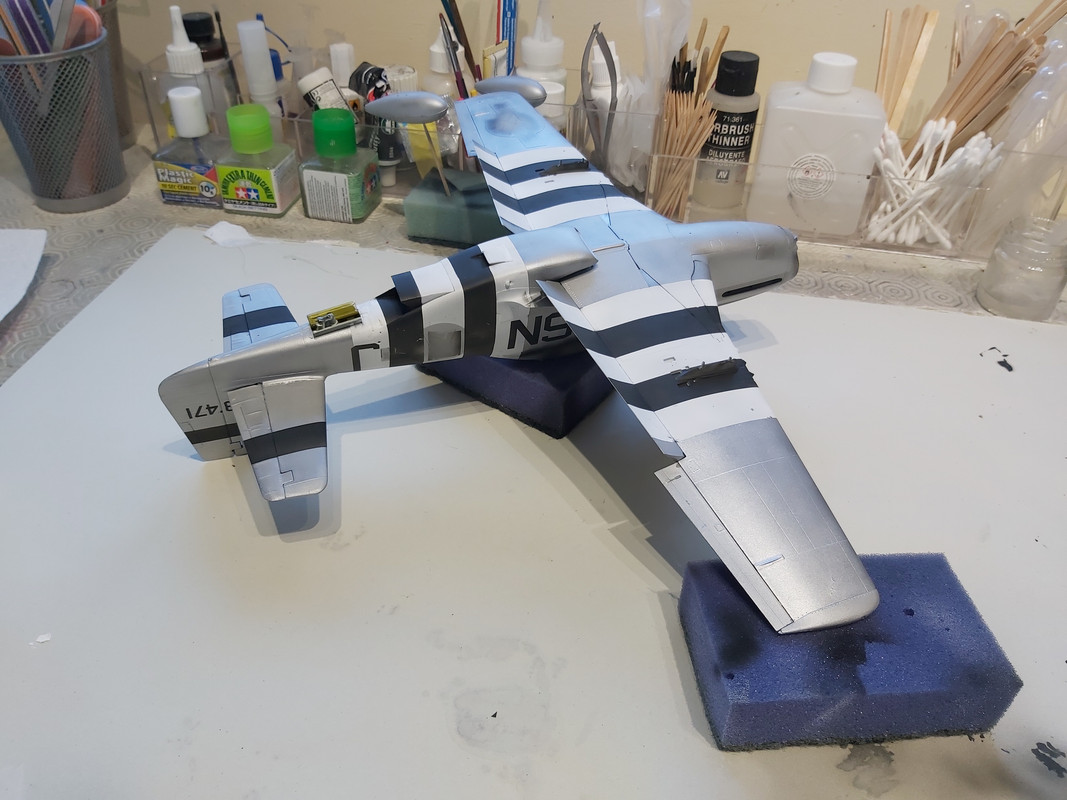
Three or four days to apply, 15 minutes or thereabouts to remove:
One of the most satisfying aspects of modelling is when the model starts to look something like the one in my head. However, there's a lot to do yet.
-
2
-
-
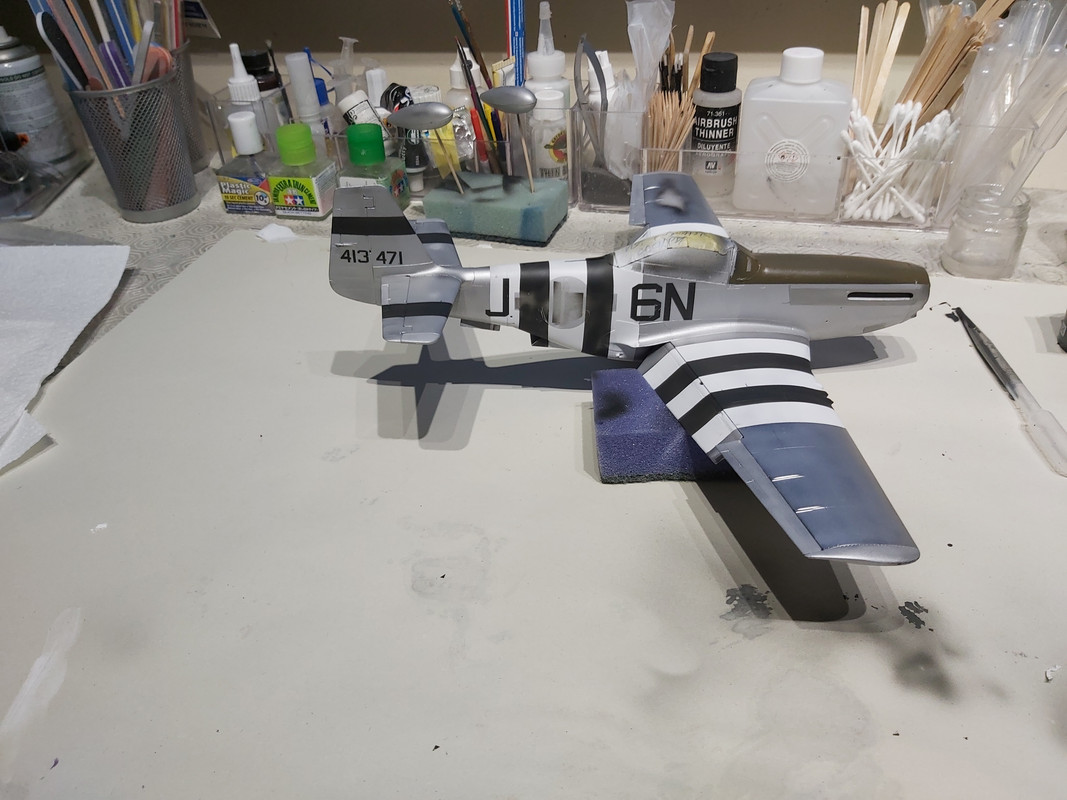
I've been working on this since the last update. Silver sprayed on the wings - Tamiya X-11 - and masked up for the metal.
I mentioned my patent I-don't-use-metallisers natural metal. This is simply Tamiya XF16 and a splash of XF19 grey mixed 1:1 with X22 Gloss, then thinned to within an inch of its life and sprayed at low pressure. Varying the mix by adding more grey or a darker grey (again, just a splash) allows colours to be varied. It works for me.
I allowed it to cure for a few days, and diverted myself with a 1:72 Airfix Spitfire Ia (I'd forgotten just how tiny a 1:72 Spit is!) and a couple of its large-scale Revell brethren - as if I hadn't got enough on the go already, my WIPs are nearly in double figures!!

The next colour was to be black, and that involved a lot of masking for invasion stripes, ID stripes on the tail, and codes and serials.
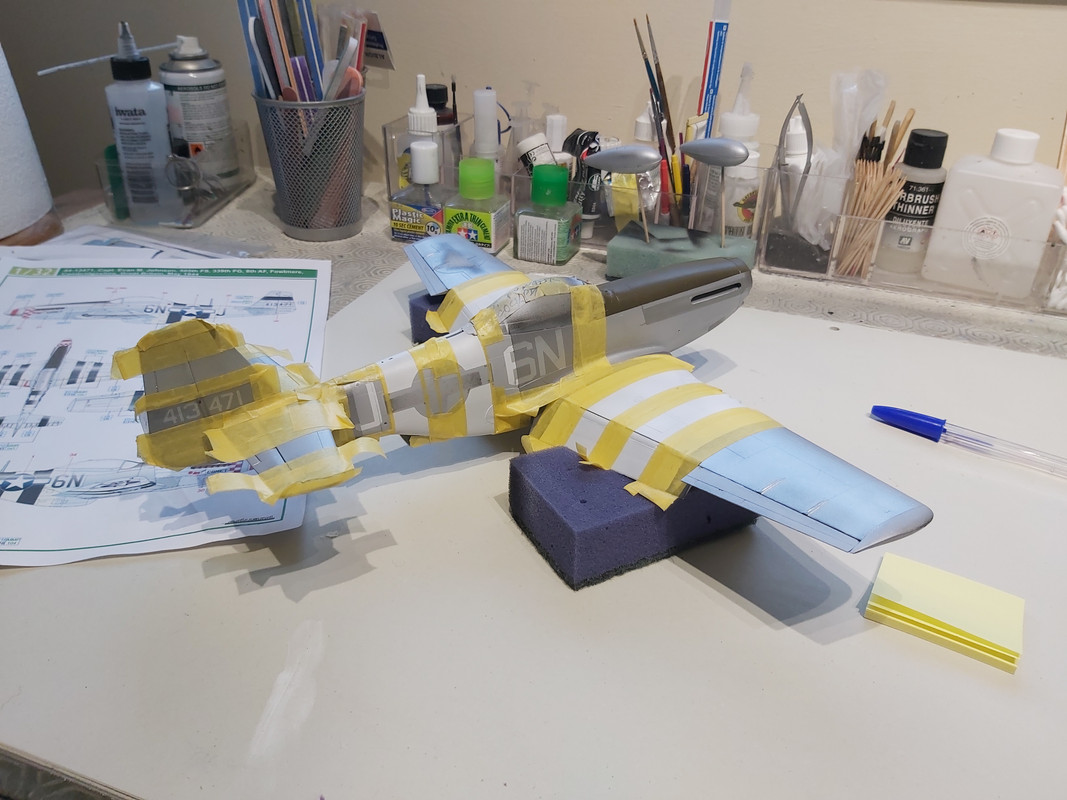
The masking was spread over three or four days, and was followed by about 15-20 minutes spraying.
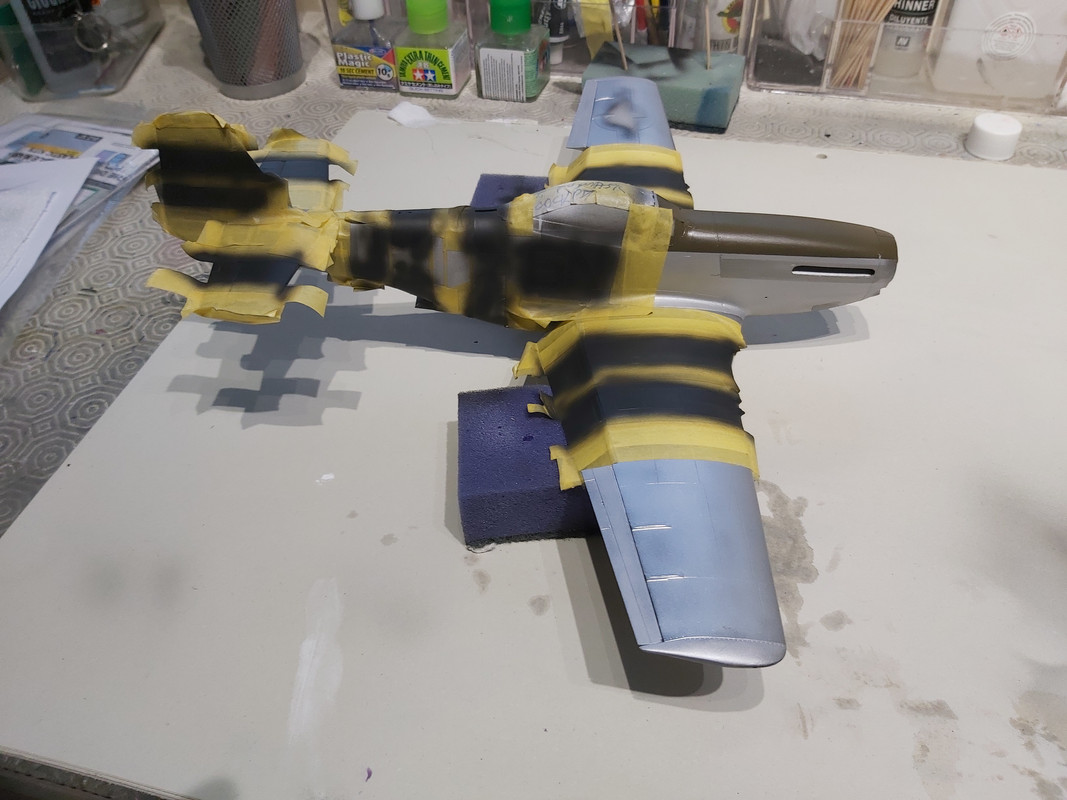
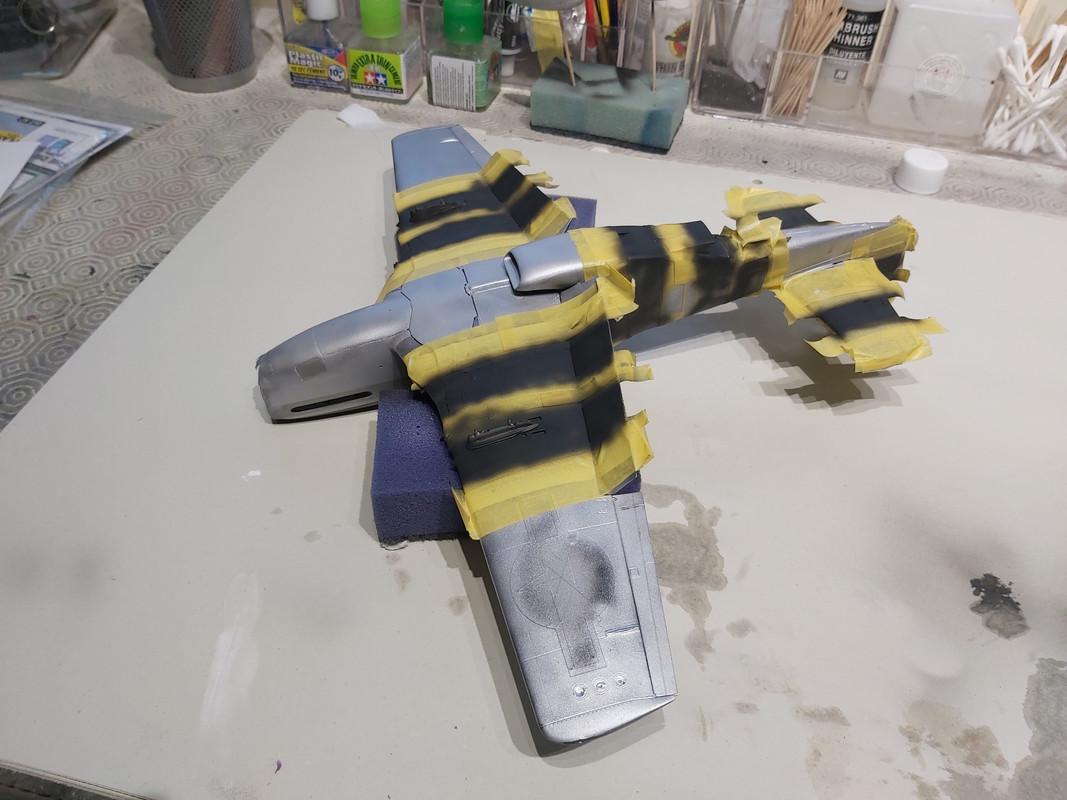
Once this masking comes off, I'll do the blue for the national insignia, then it's time for the nose art and chequered nose band.
-
2
-
-
Edited by MikeC
[Excuse me, just sweeping the cobwebs away from this thread]
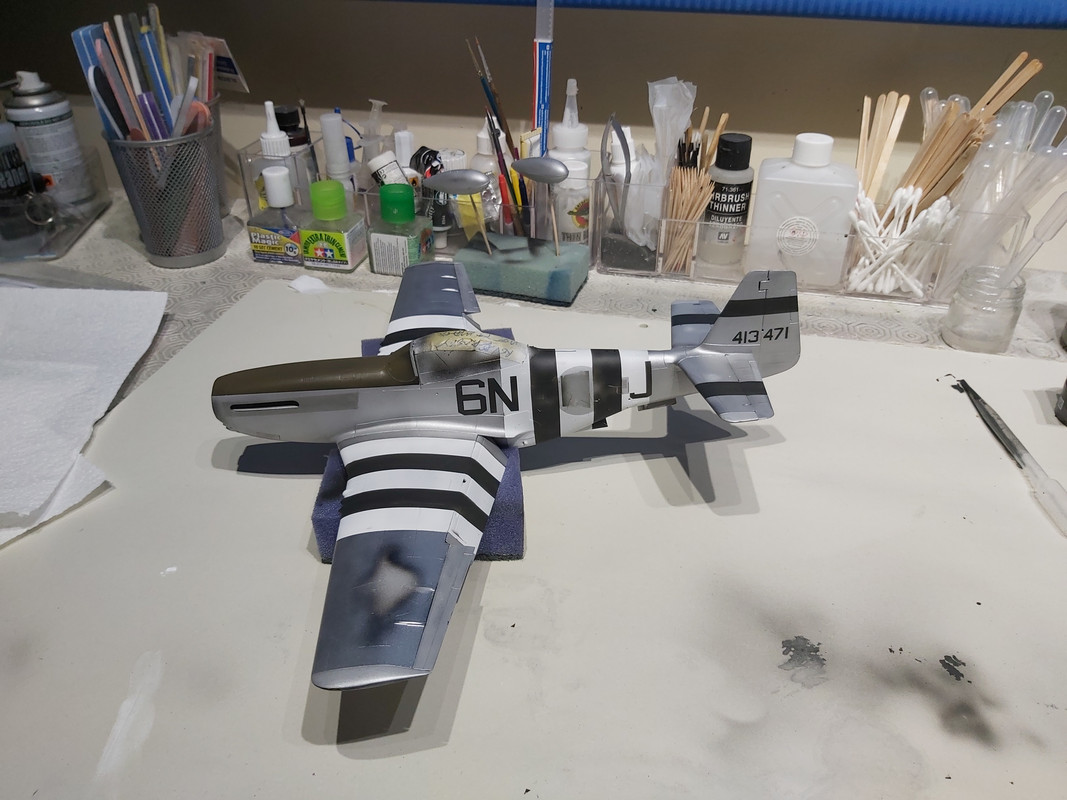
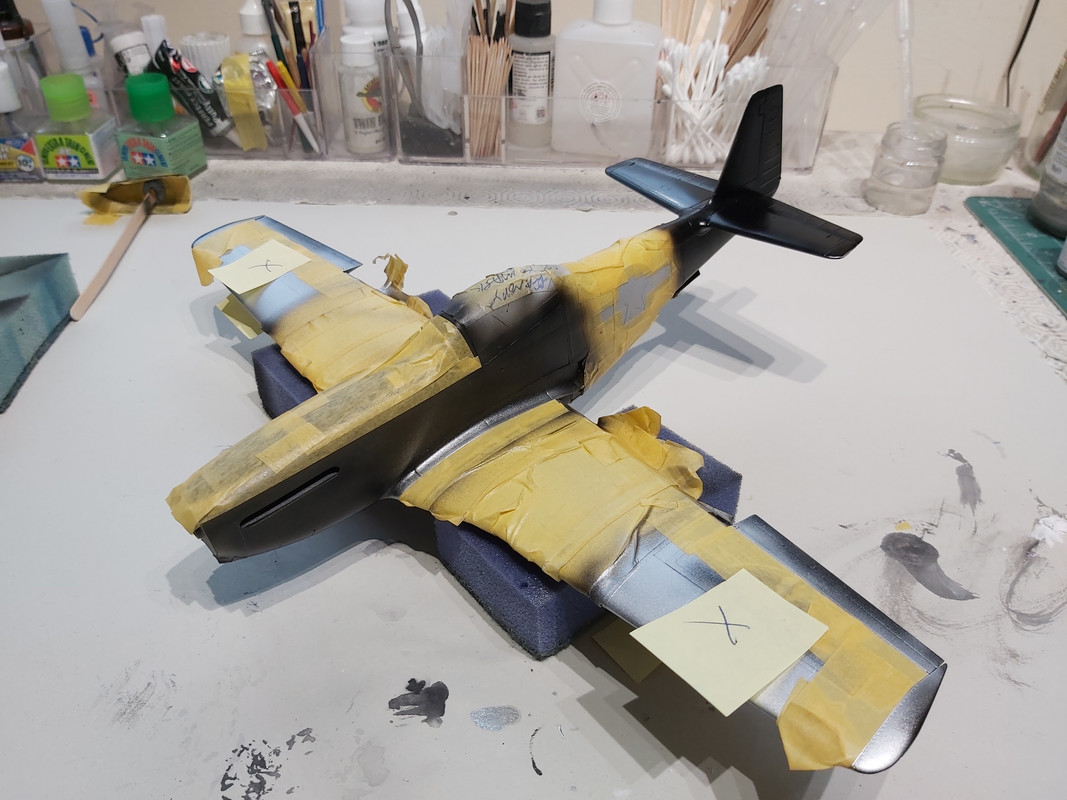
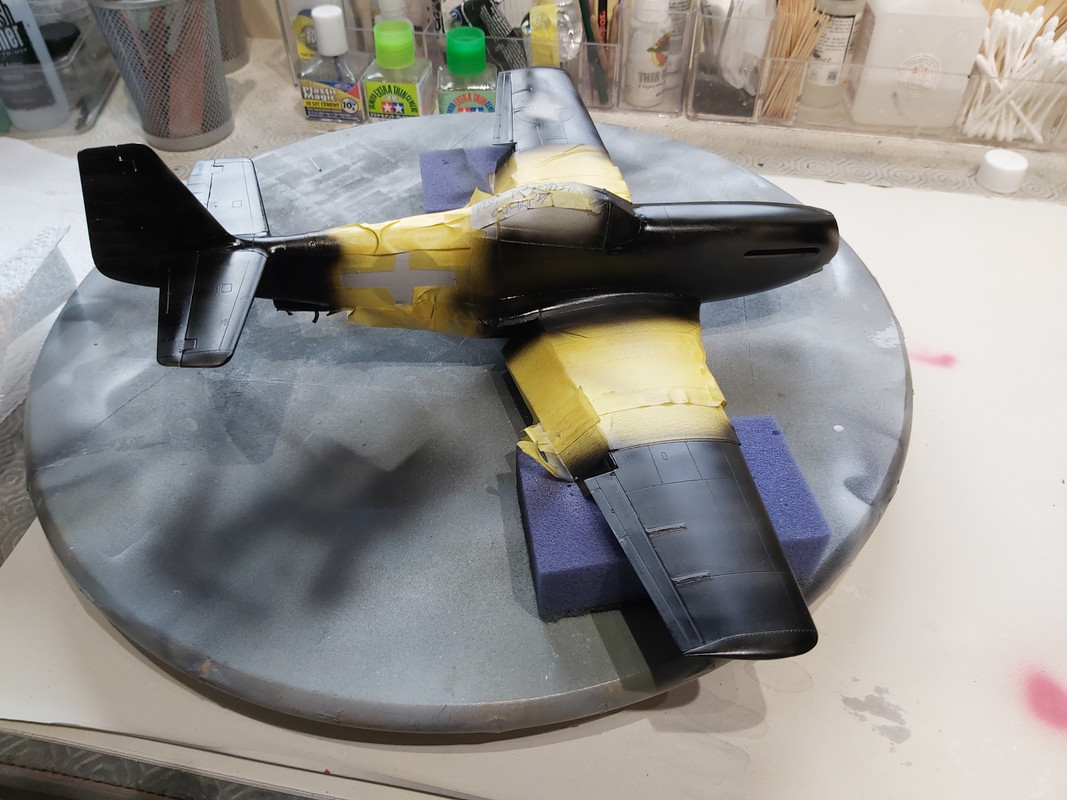
Some progress: after cleaning up the emergent-work seams etc I re-did the grey undercoat, then sprayed white where the invasion stripes, nose band and national insignia will go. Having masked those out with the masks I cut and oodles of Tamiya tape ...
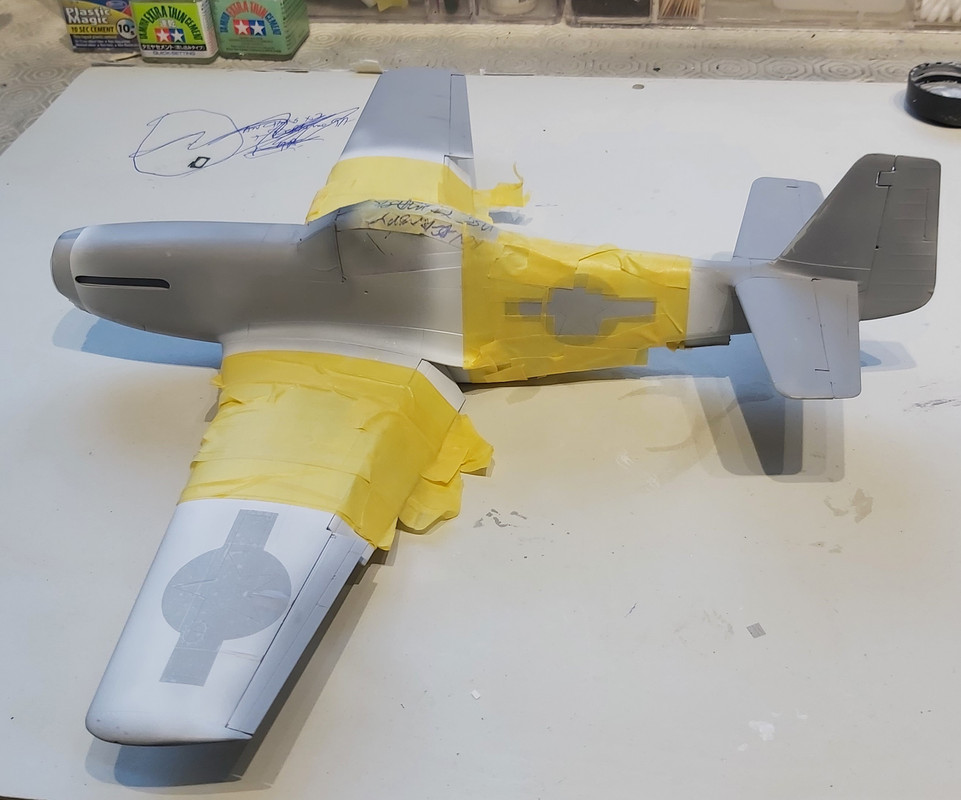
... I sprayed some X1 gloss black where the silver (wings) and NM will go.
Since then I've sprayed and masked the O/D anti-glare panel, and done the lacquered areas of the wings with X11 silver.
Next job, my patent I-don't-use-metallisers natural metal.
-
3
-
-
Edited by MikeC
Well I thought I was going to make a start on painting "The Comet" this week, but the undercoat has thrown up a few seams that need a bit more work. So please bear with.
I'm thinking that I'll lay down some white first for the invasion stripes, national insignia and nose band; then do the main metal finish over a gloss black undercoat; then take the rest of the markings from there.
-
2
-
-
-
1
-
-
-
-
What Kevin said. Plus there's a fair chance that the markings under said masks - which of course will not benefit from the clear coat - will end up with a different sheen, and thus you'll negate one of the very reasons we paint markings in the first place.
-
3
-
-
-
-
") ); and added the Quickboost exhausts.
); and added the Quickboost exhausts.


P-51D-5NA, 339th FG, Fowlmere FINISHED
in Works in Progress
Thanks Kev; wilco when she's on her legs.