

Mozart
-
Posts
321 -
Joined
-
Last visited
-
Days Won
137
Content Type
Profiles
Forums
Events
Downloads
Posts posted by Mozart
-
-
RAF Fonts.
in Q & A
I think they would have been painted at the factory, the AM contract would have stipulated colours. I have a copy of the North American Co. build and maintenance manual for the AT6/Harvard which specifies very precisely the size, colours and positions of both American and British colour schemes so I’m sure the Republic Co. had the same.

-
RAF Fonts.
in Q & A
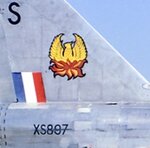
I see what you mean Ade. The serial numbers look like American-style stencils, which I guess is a distinct possibility because they were applied at the factory in accordance with the original contract and batch numbers, whereas the squadron codes were painted on at squadron’s base on arrival using the approved Air Ministry lettering style. An interesting colour film:
https://www.iwm.org.uk/collections/item/object/1060025281
Max-
 2
2
-
-
Super clear for any aspiring Silhouette users Alex, well done and thanks.
Max -
Thanks Iain! 🙂
Max
-
1
-
-
I have! 😊
-
Thanks Giorgos, interesting! Not sure I've got a "transform panel" on my older Silhouette, I'll check the next time I need to use it.
-
 1
1
-
-
Interesting Wuger. I didn’t really understand the full reason for the speed setting, but the explanation there of the more complicated designs or patterns needing a slower speed makes sense. From my experience a Force of 9 on the “Silhouette setting”, (odd that they quote machine and not specific material within the vinyl section) is just about on the margin of cutting vinyl and its backing.
Max -
Hello Cameron! Like Kev I’ve never heard of Sizzix (how do you say that word?) but I see from Google that it’s another type of crafting die-cutter like Cricut and Silhouette. All grist to the mill of making masks!
Max -
7 minutes ago, Hannover said:
Thanks, I'll see how I get on! Complete beginner in this so it should be fun.
P
Good luck! Measure the decals provided with the kit so you know what size they are. When you have downloaded the file and have it on screen, choose a marking like the one you’ve measured, for example letters, circle, star etc then drag this to the size you want.
Max-
1
-
1
-
-
3 hours ago, Hannover said:
Very nice. Can you confirm the scale for the masks?
Many thanks
P
Scale of these masks shouldn’t matter, once downloaded you can adjust to any scale to suit.
Max
-
1
-
-
Looks pretty impressive to me Steve! You’re right to start off gently!
The more work I do on the Silhouette the more I realise it’s all about method, especially finding shortcuts that not only save time but ensure accuracy. An example from yesterday: I was drawing an “S”, it was a squarish one (WW2 RAF style) so there was a horizontal line of symmetry on it. I drew the top half, grouped the lines, copied it, went to “object” on the top bar, flipped it vertically then horizontally then joined the two halves together and grouped them as one. Easy.....and so much easier than drawing the whole thing!
Max-
2
-
1
-
-
Good to see you here Michel. If you’re an experienced Silhouette user please feel free to share your knowledge with others.
Max -
13 hours ago, foxtwo said:
very interesting ! what are the settings for having a sharp cut ? (could be in my first test !!)
thanks for sharing !
Pat
My settings Pat are a blade setting of 2, force 4, speed 5, 1 pass.
Max
-
Welcome Patrick! No question is stupid, so ask away.......remember..... I learn, you learn, we all learn!
-
1
-
-
9 hours ago, Giorgos said:
Thanks for reply Mozart
Just an example I take a photo from su 27 digital camo I trace the lines with the software but when I try to cut them to the size that I want they don't get right all the time it will be smaller or bigger I have to make 30 tests to get it right it there an eazy way to do something like that?
I really haven’t experienced that Giorgos and I don’t have an answer. I don’t understand why or how the size you have drawn it isn’t the size that the machine cuts, it seems impossible not to be! Sorry, I’m beaten for an answer. 😥
-
The small size of each “box” is the issue presumably? Each box is a rectangle so no problem drawing one and scaling it, but whether the cutter can cope is another matter.
Max -
Hello Giorgos, welcome to the Forum. Can you tell us what the image is that you’re trying to scale to the right size please? If I’m making a German cross, or a British roundel for instance I measure it from the source material, perhaps the decal from the kit, or photograph. Then when I’ve drawn it with the Silhouette software I just enlarge the drawing to match the size that I measured.
I’ve also taken a picture of an aeroplane from a profile in a book, a Ju88 for example, then imported that picture, or part of it, into Silhouette. Then I’ve measured an area on the kit (I only work in 1/32 scale), say by a door and scaled the drawing on screen to match that measurement. Then from that drawing I can draw the markings to the right size to fit the model!
Hope this makes sense and is some help!
Max-
1
-
-
No, it’s not bleed at all, just a minuscule misalignment of the mask, so easy to get this wrong with chequers.
-
33 minutes ago, nmayhew said:
i have a million other questions but it's where to start...
Well I’ve set up a couple of pretty simple tutorials which deal with finding your way around the software etc, check out “Tutorials - Working Efficiently” for instance. Start by looking at those then come back with further questions. I check in a couple of times a day, certainly every morning and I know Kev does too.
Max-
1
-
-
Nick, the settings for cutting, ie speed, force, number of passes, blade depth, shouldn’t determine whether you use a cutting mat or not. I haven’t used Artool Ultramask but I use a cutting mat with EVERY material: vinyl, plastic, paper, card, lead foil etc. I can’t imagine why you wouldn’t use the mat, without its stickiness the material being cut will likely slide about and you won’t get a good cut.
Max-
1
-
-
Better late than never Steve! Welcome.
Max
-
1
-
-
Anything in particular or everything in general? Some of the posts I’ve put as tutorials might help you?
-
Welcome Floki. We’ve put up some tutorials which hopefully you’ll find useful!
-
Morning Phil. I’m afraid I can’t give you much of a steer on your questions simply because I do all my design work directly with the Silhouette software, I have no experience of importing vector files or similar from external sources. The Silhouette software is perfectly capable of doing everything that you might conceivably need mask-wise though with obvious limitations on minimum sizes. Sorry that I can’t help further.
Max
-
1
-


Greetings from UK
in Introductions
Posted
Good to see you here John. You know the masking routine, it all becomes EVEN more fun when you can design and cut your own.
Max