

Mozart
-
Posts
321 -
Joined
-
Last visited
-
Days Won
137
Content Type
Profiles
Forums
Events
Downloads
Posts posted by Mozart
-
-
On 10/13/2020 at 5:41 PM, Jerry Laawson said:
I am using a Cameo 3 with Design Studio basic 4.1....... I am presently having issues with my Cameo cutting all the way through to the transfer mat.
TIA,
\
Jerry
Jerry, you have one, or more settings wrong if the cut is through to the mat. Firstly check your blade depth, it really shouldn’t need to be more than 3 for vinyl. When you press the Send button, check the force of cut, typically 4 is ok, and one pass only. Hope this helps.
Max
-
Hello Lee, glad to see you’re interested in the masking “thing”, it’s the way to go! There are a few basic tutorials here already but if you need further or specific advice just ask away.
Max
-
What fun, and a great idea for getting in some practice Denzil!
Max-
 1
1
-
-
Good to see you here Mark! I agree with Kev, the Silhouette seems to be the market leader, so you are more likely to find advice and tips/tutorials for it than perhaps machines such as the Cricut.
-
 1
1
-
-
15 hours ago, Kevin Futter said:
Excellent experimentation, Max! I really would have thought that Bare Metal Foil was too thin to cut with one of these devices, but being able to certainly opens up a lot of possibilities!
Kev
I was pleasantly surprised too Kev, I expected the foil to be chewed up, but it even managed to cut the 1mm circles quite effectively. I can't recall the exact settings so I'll have to do a reprise! 😃
-
1
-
-
I did a little experiment a couple of weeks ago with my Echelon Lightning, I wanted to make a bit more variation in finish etc so decided to feature the "elephant ear" panels just aft of the cockpit. I traced the outline from the model onto thin paper, scanned this and uploaded into Silhouette then cut the panels out using Bare Metal Foil, which is extremely thin! It took a few attempts to get the shape and settings right, but it worked very successfully. I'm really excited about this because with models such as the beautiful Hawker Fury, Hart, Demon etc to build the technique opens up a whole new range of possibilities.
Max

-
4
-
-
Good luck Denzil, have fun and give us some feedback.
-
2
-
-
Hello Gary, good to see you here!
Max
-
I’m not that tech-savvy to be able to do all that Kev, I’ll stick to the manual method!
Max-
1
-
-
Good on you Kev! Must admit I've never used the trace-function, preferring to "do my own" thing. I've read reports that were less than impressed with trace-function results but yours seems to have turned out very well.
Max
-
1
-
-
Thank you, that all makes perfect sense! 👍
-
1
-
-
1/72!! Incredible!
-
1
-
-
The black and white image of the Mustang is superb, really love that!
-
20 hours ago, Jerry Laawson said:
Very helpful. Thanks for sharing. Really like the results. So much better than decals.
You’re very welcome Jerry. I remember the first time I used (commercially produced) masks I found it really difficult to understand the order of doing things and actually made a right hash of it, so if my thread helps you to do it more successfully then my efforts will have been worthwhile! 😃
-
1
-
-
Hmmm, interesting that you’ve sprayed black then masked RS-19 and allowed the black to show through the silver top coat, kind of reverse masking Valerio. Any reason why you have done it that way?
Max -
12 hours ago, BlueNosers352nd said:
Hi, my name is Jim .........
What to do, what to do, what to do?
Welcome Jim! Once you do it, and you know you want to, you’ll never regret it, in fact you’ll wonder how you ever survived without it! Don’t forget, the Silhouette Cameo cuts plastic as well as vinyl and a host of other materials too.
Max -
12 minutes ago, Kevin Futter said:
Thanks, Max. I guess I'll have to upgrade at some point soon. I need to use the thing at all, first! My current project features some damaged USAF code letter decals, so that looks like a good place to start.
Kev
It’s so well worth the upgrade Kev. In all honesty I think that software should come as standard but at least it’s not too expensive.
-
2
-
-
-
-
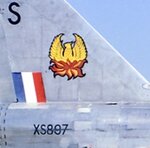
I've been doing the serial numbers for my Lightning this morning so here's the way that I went about it, but firstly a reminder of the main tools:
I scanned the decal sheet that came with the kit and put the image into my photographs folder.
then dragged the image into the Silhouette drawing area, scaling the image to a convenient size and clicking "send to back" (top tool bar) so that I could draw over it. I'm doing XS901, so I could trace the X and S and the 9. I started with the 9. The centre looked circular to me so I selected the line/circle tool and drew the inner. I copied this and enlarged it for the outer concentric circle. I grouped these two together, copied and pasted and moved this below the first circles:
I used the straight line tool for the small horizontal on the 9's "tail" and a couple of verticals on the back of the 9:
Then with the erasure tool I started to get rid of unnecessary bits - take the erasure tool close to the line but not too close at this stage. When I'd cleaned up most lines I went to an increased zoom for the detailed clean up - I moved the verticals slightly to one side then erased the curved line:
then replaced the vertical, adjusting its length slightly if necessary. Within no time, the 9 was complete:
Click on all line elements whilst holding Cmd+Shift and go to Group items then click for your finished 9.
The S needed a bit more thought and a different procedure because there was no symmetry in any axis. So on the line select tool I chose the icon that looks like a figure 8 on its side, the curve drawing tool. Again remember I'm tracing over the decal onscreen. Click on the start point then click frequently following the outside line, more frequently on tighter curves. Be as accurate as possible but adjustment is easy later if you're slightly off:
Stop where the curve meets a straight line, this tool will not go round sharp corners!
Add the horizontals, if you go wrong at any point just go to the edit tool on the top tool bar and click on the undo button:
If you want to fine tune your lines double click on the line and you'll then be able to move each point as much or little as you want to produce that smooth line. If you're working as I do to an enlarged screen any small variations will disappear as you reduce scale/size.
Again finish by grouping all the elements and saving.
For the X I traced one half of it. When drawing straight lines when you come to a corner do a quick double click to continue drawing in an "uninterrupted" way with a double click when you end. I grouped these lines:
copied and pasted:
then went to Object on the top tool bar, selected Mirror horizontally from the drop down menu:
then moved the two halves together and grouped:
The number "1" was very straightforward!
The 0 could be done in different ways; clicking around its perimeter as with the S or drawing as with the 9. I copied the 9, ungrouped all the line elements then copied the longer vertical on the back, pasting this on the front side of the shape:
Then with the erase tool I took out all unnecessary elements as before, re-grouped all and saved. I then assembled "XS901" together, grouped all and scaled to the correct size. The underwing serial was complete, from a further copy I scaled to the fuselage size, job done!
The stencil was cut using Oramask 810 with a blade setting of 2, force 4, speed 5, 1 pass.
Hope this has been useful to those of you new to cutters.
Max
-
11
-
2
-
-
14 hours ago, FloydWerner said:
The Erla company had 90 x 90 fuselage markings along with simplified and wider upper wing markings on their Bf-109G-10s. How do I resize or make new ones?
Floyd
Do you already have the Silhouette file downloaded and/or on your screen Floyd? If/when you have, go to the arrow (edit tool) in the top left corner and click:
this should bring up the dimension box and handles around the cross. Then simply grab one of the handles and drag out to the required size, making sure of course that both the x and y axis are the same. Click Save then copy and paste as many times as required.
Max-
1
-
-
So glad that turned out well Chris, I love a happy ending! 😄
-
Well here's some good news.....my Cameo 2 has risen phoenix-like from the ashes! A friend who knows about these things suspected it could have been the ac-dc converter that was at fault so he tested it, and sure enough that was it. So a new converter costs £15.00.......the Cameo 4 is cancelled. 😁
-
4
-
-
I've ordered a Cameo 4, should be here Monday!! 😄
-
2
-


Greetings from Belgium
in Introductions
Posted
Good to see you here Flip. If you have anything specific to ask, feel free to do so. Can't guarantee an answer but I'll do my best!