Leaderboard


Popular Content
Showing content with the highest reputation on 09/26/2021 in all areas
-
Howdy folks, Thanks to a suggestion by member @GeneK, I've set up a new Downloads section dedicated to cutting files for applications other than paint masks: https://www.scalemodelpaintmasks.com/index.php?/files/category/22-non-mask-cutting-files/ There's also a corresponding section in the forums for the usual discussion: https://www.scalemodelpaintmasks.com/index.php?/forum/21-non-mask-applications/ The idea here is to have a home for cut files that are intended for applications other than paint masks, such as cutting thin styrene or other materials for making parts. That's just one example, and I'm sure you creative lot could come up with many more! Enjoy! Kev2 points
-
No, I'm not trying to blaspheme, but you can make the thinnest decals in the world this way. There are circumstances where masking the surface of your model is simply not going to work as I discovered during my SBD build HERE. So, keep this idea in you bag of tricks for future reference. You will need a quality clear decal film like the one available from Microscale and LACQUER paints. Assuming you have your Oramask 810 masks ready get started by painting your decals. Make extras! Carefully sliced through the clear film only leaving a small area to grip with my clamping tweezers. Do not cut the decal paper close because as you pull the paper out from under the decal you need the paper wide enough to support the width of the decal. Kinda like the slow motion version of getting a pizza off the spatula, or whatever it’s called. The decal is so thin that if you don’t support it, it will fold under itself and you’ll drive yourself insane trying to fix it. Make extras! Wet the decal from the bottom side so as not to dilute the adhesive, and removed the excess film with tweezers, but the part being clamped remains. The discarded film is that shiny thing to the top and right of the picture below. First some generous drops of Micro Set then carefully keeping the decal paper close to the model’s surface pull the paper out from under the decal. Then use a wide wet brush to work out the wrinkles the and then roll a cotton bud over the decal to work out the excess water and trapped air. You need some moisture under the decal because as the moisture evaporates the decal displaces the moisture. Setting solutions soften the decal to make it more pliable. Let it sit for a few minutes and airbrush a couple coats of Micro Sol over everything. This is typical of the results I got in all 6 positions. I chose this photo because you can see how well the decal was sucked down around the latch. So, how thin can a decal be? I defy anyone to tell the difference between a decal made this way and markings painted directly on the model. CAVEAT: Unless there is a situation like my SBD I will always paint my markings directly to the model. It's just too gratifying not to.1 point
-
My recently completed 1/48 Hasegawa Typhone Mk Ib with Montex Masks. Only decal was the pilots kill board. First time using masks successfully. The issue I see for me it transferring and getting the right things to stick. Did a little test before with Stars/Bars and that was entertaining. Maybe I'll just stick to Japanese aircraft! 🤣1 point
-
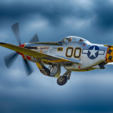
Here are a few recent completions using my Cameo4. Eduard's rebox of Hasegwa 1/72 B-26. All marking done on Cameo except for nose art. Eduard's 1/48th P-51D as June Nite.1 point
-
I originally built this model some time in the early '90s, after just getting back into the hobby from a long layoff. In 2007, I decided to rebuild it rather than toss it out, and can actually present before and after photos! Here it is as originally built and painted, prior to being disassembled for the rebuild (apologies for the crappy photo): And after several months' work, which featured lots of scratchbuilding and a complete rescribe, here's the renovated result: Needless to say, all the markings, save for the tail number and a few stencils, were painted on using hand-cut masks (this was long before consumer-level craft cutters had become commonplace). Still one of my most enjoyable builds! Kev1 point
-
The idea behind this was to create something for the Spruce goose. What if Howard Hughes had finally got his beloved "Hercules" into service, maybe in time for Korea? Why not? https://u.cubeupload.com/SAEvans/HK13.jpg This was my very first use of the Silhouette 3 for creating a full set of markings. So basically I needed something fairly simple, not too intricate for me to get to grips with using the programme and the machine. I practised on a number of types of vynil and transfer tapes...lessons learned for future projects of a more daring nature.1 point
-
Remarkable examples of what can be done using home-produced masks, well done Gaz. 👌1 point
-
View File Blockschrift fur Flugzeuge Common WW2 German aircraft code font. Some differences might occur, aircraft specific... The larger and smaller letters/numbers are correct size-wise for doing later codes, i.e, those with smaller unit codes and then the Staffel/aircraft code. So selecting both and resizing to fit your specific aircraft should do the job Submitter IainM Submitted 02/15/2021 Category Luftwaffe - WW21 point
-
View File 1/32 Generic Luftwaffe spinner spirals Here is my first attempt at creating spinner spirals for 1/32 Luftwaffe aircraft. I don't have any fancy program to do proper curves, so it might be a bit crude, but should do OK at 1/32nd or smaller if scaled. Hope you find this useful.... Submitter IainM Submitted 02/14/2021 Category Luftwaffe - WW21 point