Leaderboard
Popular Content
Showing content with the highest reputation on 09/06/2021 in all areas
-
The comet started life as two concentric circles, seen here before final alignment. The tail was then drawn by eye using the polygon tool, with the outer edges as tangents to the inner circle. I used the eraser to get rid of unwanted lines, then grouped it all and added a box.3 points
-
So let's start with the nose art. It's really all done by eyeball estimation, base on the datum that the panel it will sit on is about 0.22" high. I started with the name, "The Comet". "Comet" was started using the text tool again, with a font called "Stencil Gothic BE" which comes with Windows 10. This is not exactly the same, in that the "T" is solid in the font, and needs a cutout. So with apologies to those for whom this is old hat (this software is still a journey of discovery for me): a word created in the text tool can be ungrouped to edit individual letters. So it was a simple matter to magnify the "T", use the eraser tool to make the cut-out, extend the lines on the horizontal and vertical bars to make each a complete rectangle, then group them to make the letter. Then I made sure the letters were the same size, aligned and grouped them. "The" started off in the text tool in Arial font. After ungrouping, the H and E were reduced to about half the height, then the fun began. Using the point edit tool on each letter in turn, I got them to about the right shape; then drew three straight lines to check the alignment and adjusted accordingly. To ensure the lines were parallel I simply drew the first one, then used the duplicate function. Then it was simply a case of drawing two small circles, size and group everything up, draw a box round it all, et voila: I tend to group in stages: so as we saw, the letter of "The" were grouped, as were those for "COMET" Then the dots at each end were grouped; then add "THE"; finally, group that plus the box. Next, the comet itself.3 points
-
I'm doing a Revell P-51D-5 as part of a Group Build over on the Large Scale Planes forum https://forum.largescaleplanes.com/index.php?/topic/90601-p-51d-5na/ I specifically picked a subject, and a reserve, that I considered I would be able to do with masks. My first choice is 44-13471, 6N*J, "The Comet" of the 505th FS, 339th FG, assigned to Capt Evan M. "Johnny" Johnson. This has a name, a nose art I felt I could draw in the Silhouette software, red/white nose checks, and best of all (for me) full D-Day stripes. I don't intend to repeat on here all I've posted there, but thought I could expand the masking-specific bits here for anyone who's interested. My reserve is for the event that I fail to manage the nose checks, and has just a name: 44-13708, B7*I, "Duchess of Manhattan" of the 374th FS, 361st FG, Bottisham. I have a certain fondness for Bottisham, I may even have to invest in a second kit and do that one! So without further ado, here we go.2 points
-
Mighty fine work here. There are a lot of mustang scheme that never made it to decals manufacturer, and it's great to see them build. Keep it coming. Mathieu2 points
-
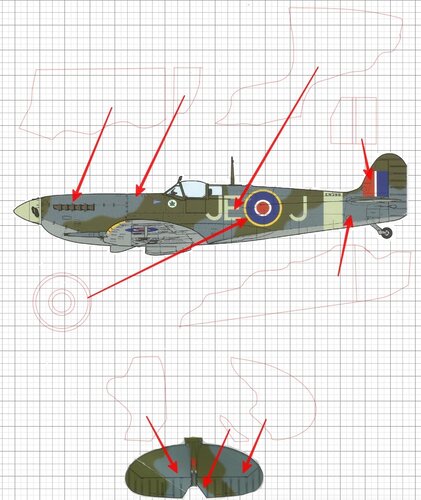
OK, so time to bite the bullet....the main panel! I reckoned the exhausts were likely to be the most troublesome area so I took a lot of pains to measure and draw as accurately as I could, first attempts at the panel cut-outs weren't satisfactory because they're not ellipses: so using the curved line tool I re-did one carefully then copied: much better! The lower curved line was going to be tricky too so I took datums (data?) from the centre of each exhaust stack: Clearly the photograph I took as my reference couldn't make allowance for curves in two dimensions, so this was all a bit wet finger in the air as a first trial. The cut was clean: and fitting the foil unexpectedly easy, though it's definitely a two "free hands" job: but you can see that the lower curved edge needs further work. The foil once burnished down shows every flaw of the surface underneath so that's something I need to pay a little attention to, though it actually looks rougher in these pictures than in the flesh. I decided not to try to accommodate the inlet, that will have to be painted I'm afraid. The three vents are OK-ish....the resin moulding isn't that crisp and the foil accentuates it so I may try to smarten that area up too.....but all in all quite promising! Max2 points
-
Thanks for the running tutorial, Mike! Looking forward to seeing how it all turns out. Kev1 point
-
Thanks Gents. Although for full disclosure I should mention that I've used drawing software before, not least Powerpoint (now-fading memories of work!!!) and even dabbled in a CAD package (again, that was for work), so it's more getting used to the particular wrinkles of the Silhouette software than coming at it ab initio.1 point
-
Hi, my bad, I tought your subject was Big Doll D-5. Guess your subject is a perfectly filetless Mustang. Very nice work on your masks btw. Cheers. Mathieu1 point
-
And you’re using the tools and techniques exactly right Mike, adapting what is easily available then personalising it. It’s great to see you discovering how to do this then explaining it all here.1 point
-
Excellent stuff Mike! Chequers are a real challenge, both drawing accurately on other than a dead flat surface, and applying. Good luck, looking forward to seeing more both here and on LSP. It’s inevitable that the smallest markings will have to be decals, I’m reluctantly using a few on my Fury that are impossible to make masks for. Max1 point
-
To start with, a confession: I'll be using some small decals for the six kill markings, as I'm not that confident about cutting things that small. The lettering and numbering was simple enough: I produced them in the text tool using a font called USAAC Code, which a fellow IPMS branch member pointed me at. The serials are 8" high, and the codes 24". (Incidentally, I make no apology for using Imperial units - I can use SI units equally well, but the original was measured in Imperial units, and I'm modelling it in a scale based on said units, so it makes life a lot easier. I'll include metric conversions if there's a popular demand.) The national markings will be done using dashotgun's file from this forum, and the invasion stripes will be masked the old-fashioned way with Tamiya tape. What I intend to deal with here are the nose art and the checks.1 point
-
Looks fine to me. I'll have a look for that FB group, thanks for the heads-up. [Edit] It seems I'm already a member of that one, there are so many FB groups I lose track. I'm actually doing mine over on LSP for the Revell GB, I'm planning to put some of the mask-specific stuff over here as well. https://forum.largescaleplanes.com/index.php?/topic/90601-p-51d-5na/1 point
-
I did think about test panels Mathieu but decided to go for broke, nothing quite like the real thing: So firstly I measured the panel top line as accurately as I could, 35.5mm and did my usual dimension line onscreen then scaled the photograph to suit: Once that was established I drew the whole panel, copied it then flipped the copy to get the port panel: Next, the guess at the cutting settings: ....and those worked first time! Very happy with the results, giving some thought next to the main engine panel...🤓 Time the next exciting adventure....😁 Max1 point
-
1 point
-
No time for proper modelling today but I did manage a minute with camera and computer to do some prep for the nose panels. The plan is to import this picture into the Silhouette and cut each panel in Bare Metal foil as outlined above, no prizes for guessing which is going to be the most difficult! Going to start with a simple one to see how it cuts and adheres, might find five minutes tomorrow. 😁1 point
-
On with the job! So here we are with the model substantially built and primed ready for paint. The upper wing is just resting in place: You can see clearly here that the undercarriage, interplant struts and cabane struts are white metal. The struts have a very solid and robust key into the upper wing. First application was trainer yellow: I later saw that the yellow needed to come further forward on the port side, so that was amended. The struts were also sprayed then masked along with the rest of the yellow ready for the Dark Earth background: I could have "free-handed" the camouflage but decided to make masks. One of my reference books had some useful scale drawings which I scanned as guides: ....and these were used as shown below: The vertical line drawn on the Silhouette to the dimension of the leading to trailing edge enabled me to get the right scale for the drawing by reducing or enlarging it as necessary, this technique is used on all the masks I produce. This was all very easy for the wings and empennage: And before too long: I considered doing Silhouette-produced masks for the over-fuselage camouflage but to be honest it was more fuss than it was worth, so some ordinary masking tape with a slightly wavy edge soon did the job. And when all the masking tape came off: Inevitably there are one or two small areas to touch up, but for a model that was so heavily masked I'm pleased with how little I need to correct. The final fuselage painting task is the nose panels. I'm going to firstly investigate using Bare Metal foil, cutting the panels with the Silhouette from a scanned image, but the default will be natural metal paint finish.1 point
