

Mozart
-
Posts
321 -
Joined
-
Last visited
-
Days Won
137
Content Type
Profiles
Forums
Events
Downloads
Posts posted by Mozart
-
-
-
Welcome Iain, always good to see new members. Enjoy your new toy, it will soon become an essential item for you!
-
 1
1
-
-
13 hours ago, MustangManiac said:
I know how to take the blade out but do I need to look at anything other than the indicator on the side of the tool?
No, just the indicator though I always lightly run my finger across the end just to gauge how much blade is sticking out.....be careful!
-
When you take your blade out of the holder, is it really set at 1? Check that first, it sounds to me like too much blade is showing if it’s cutting that deeply on the figures you’ve quoted.
-
14 hours ago, denders said:
Thanks Max. I thought about that too, but being a retired engineer........... I thought I'd try to make it harder. 🤪
Ha, well I’m a retired art teacher Dave, so everything is “visual” for me! 😆
-
I’m afraid I did mine very much “old school”, neolithic even! I taped the area to be masked on the canopy then drew around the outline as exactly as I could. Then I took the tape off the canopy and laid it flat on the bench, photographed it and imported that into Silhouette, then drew it out. I needed to tweak it a little in places and on the more severe curves on the internal masks added a “cut line” to accommodate the curvature.
It might seem long-winded but it works and of course it’s easy to duplicate for both sides of the outer canopy, AND by reducing the size slightly you’ve got the internal masking.
-
1
-
-
Good to see you here Peter.....any questions just ask away though there’s already some useful stuff on this forum.
Max
-
1
-
-
Not sure why you need to turn a scanned image into a vector file Lee, I never have. Once scanned (into my photos folder) I just "slide" the image across into the Silhouette drawing page and enlarge as necessary from there. You'll need to go to the top tool bar and "send the image to the back" before you can start tracing it.
Hope this helps
Max
-
Stunningly beautiful and full of atmosphere.....love it! 😄
-
Very lifelike, my kind of photo! Well done.
-
Good to see you here Dave, hope all goes well with the Silhouette!
-
Perhaps they have Kev, I’m pretty sure my Cameo 3 didn’t have those features before I had the Designer upgrade, but good on Silhouette if they have incorporated it!
-
2
-
-
From a modelling perspective, the basic software enables you to draw straightforward designs for masks such as roundels, crosses, stars etc as well as letters, but the real game changer is the Designer software which is an add-on package, not expensive, but so worthwhile. With this package you can import photographs for instance and trace around shapes, this opens up so many other possibilities.
Yes, there is a whole library of designs that I’ve never used because they are intended for people who make cards, for scrap-bookers etc. but the tools (draw, copy, paste, orientate, scale, delete, group/ungroup etc) that are used for any craft remain the same. You’ll never regret buying one and investing in some time to learn how to use it.Max
-
1
-
-
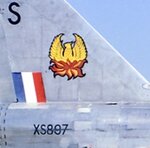
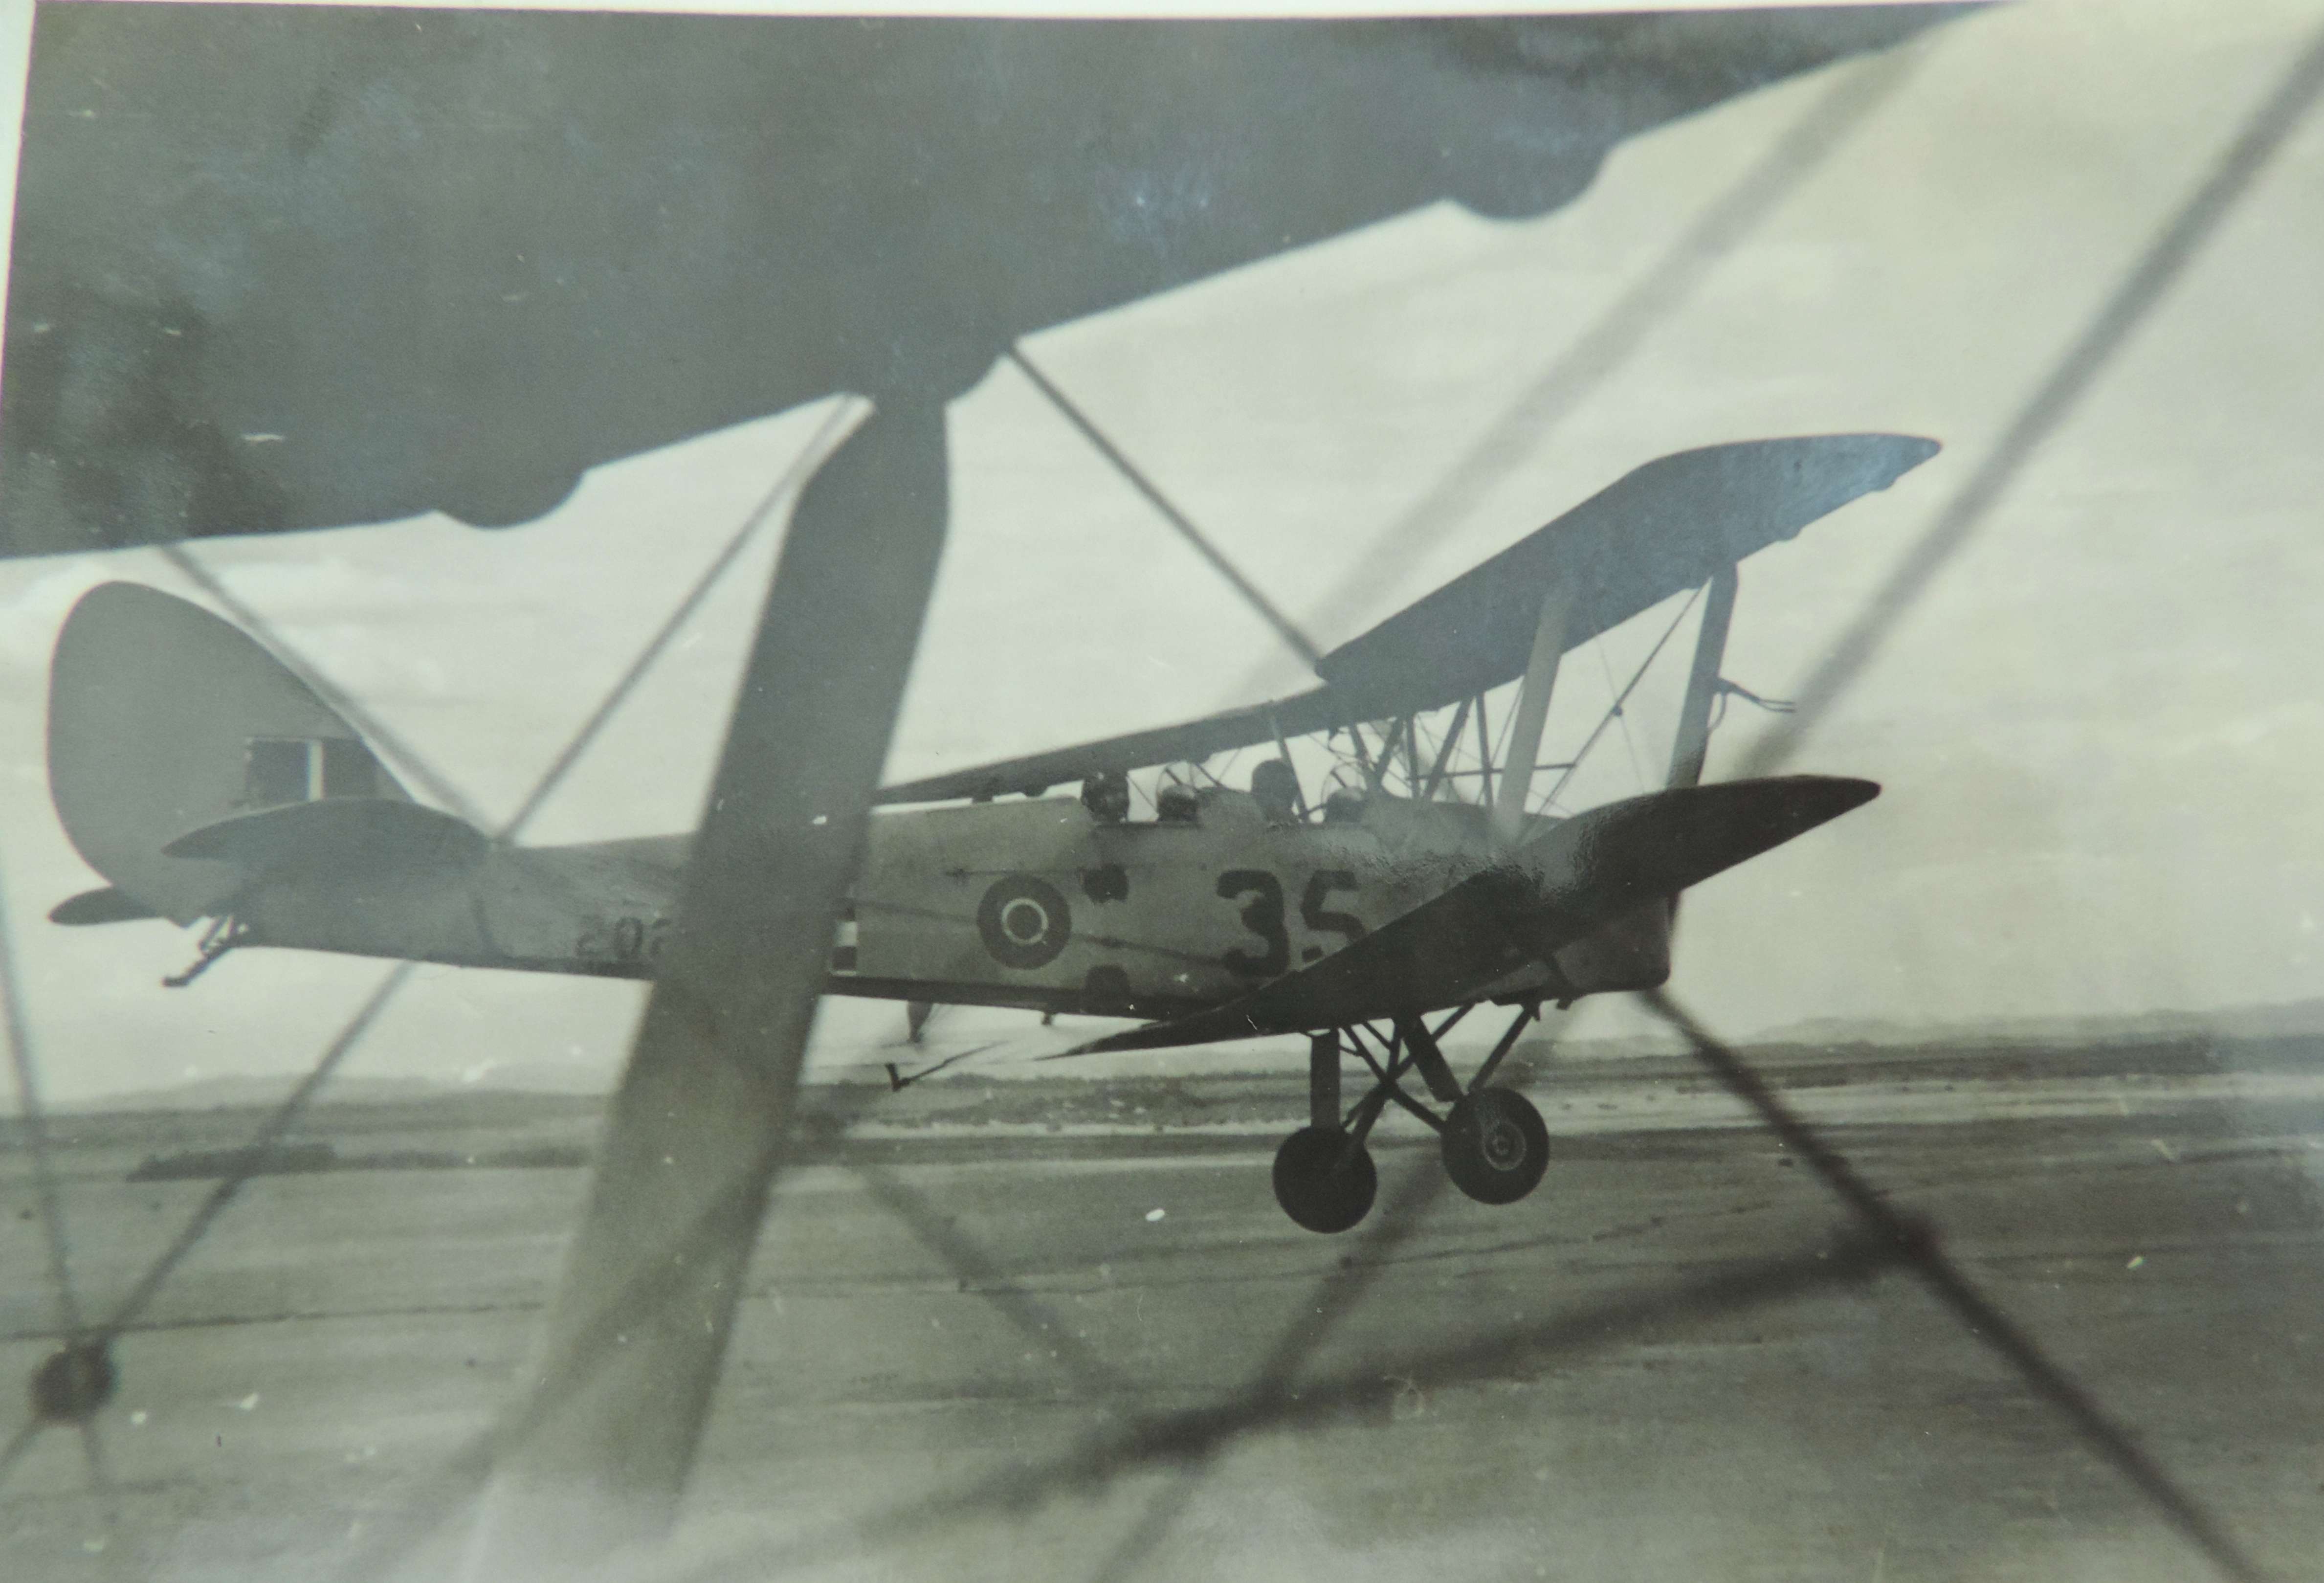
I'm building the Silver Wings 1/32 scale Tiger Moth, specifically this aircraft:

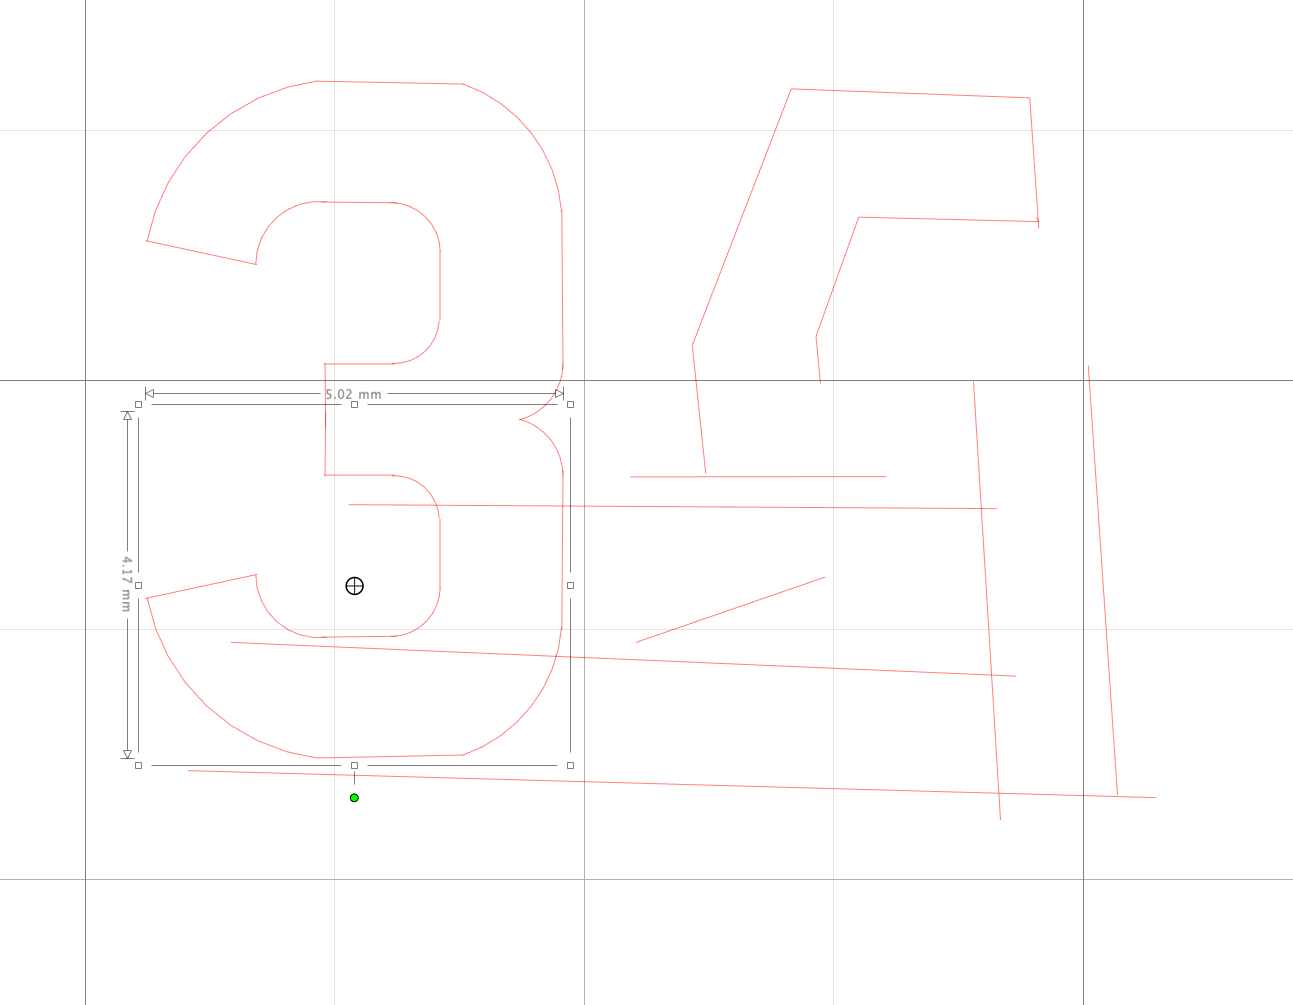
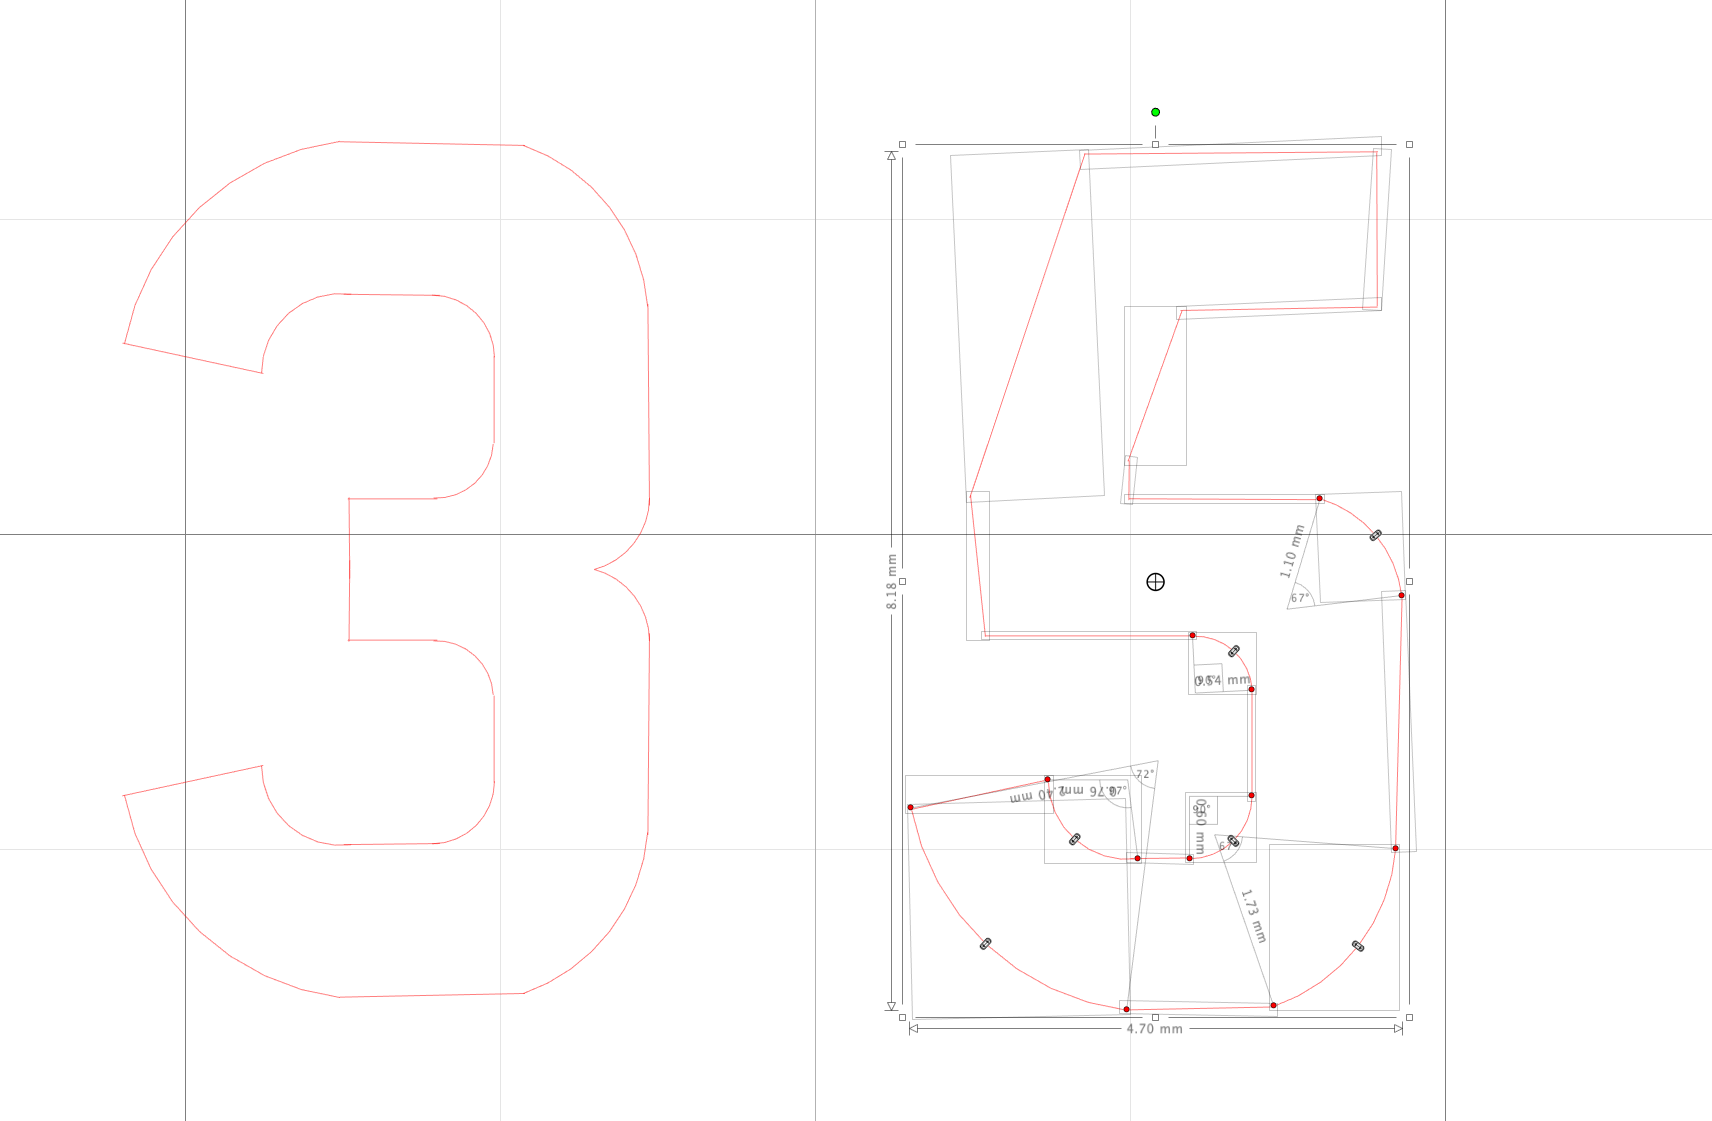
since it was flown by my father in 1943 during his pilot training is S Rhodesia. It presents a few problems for masking, most notably the chequerboard band on the rear fuselage (just visible behind the strut) and the large, rather unorthodox "35" on the fuselage.
To do the chequered band I wrapped some thin masking tape around the fuselage having decided that a scale 4mm was about right for each square, and there are three columns. So the forward and rear masking tapes were 12mm apart. The taper on the fuselage is the tricky bit because clearly the "circumference" is going to vary. Once I'd got the positions right, I took the masking tape off and laid it on my cutting mat 12mm apart along its length. I took a picture of it:
then imported the picture into the Silhouette software. This gave me the wrap around shape fairly accurately. Then I set my grid background to aid drawing to 4mm and carefully drew things out:
then cut:
It needed a bit of tidying up but it's ok!
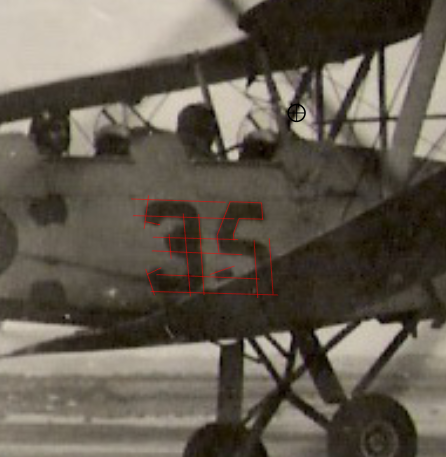
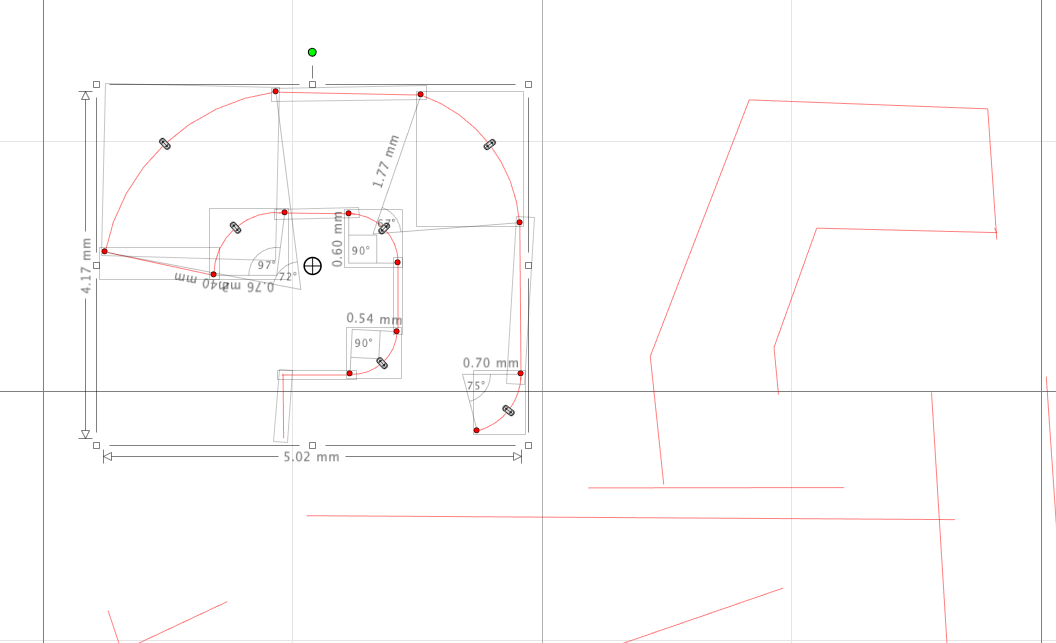
Next the "35"! This proved just as challenging. I used the photograph, enlarged as much as possible, again imported into Silhouette then drew some guidelines:
which when the picture was taken away was something like this, though I've added the curves (drawing arcs is another ball game). Here I've selected the top half of the "3" to group all the bits, then copied, flipped and pasted below to form the whole number (and also the lower part of the "5":
I always work with the drawing as large as possible to ensure accuracy with lines joining up. If you don't you'll have uncut gaps which will cause problems when you come to use the masks.
The end result:
Any questions or comments welcome!
Max
-
5
-
-
Very sharp Rick, you’ve obviously got to grips with the Silhouette! Good to see another “user” (in the best sense iof course!) here on the forum.
Max -
Hello Dave, I can’t answer most of your questions I’m afraid because I use a Cameo 2 which to my knowledge doesn’t have a Bluetooth function nor roll stock holder (?) but the one thing I have learned in the 5 or 6 years that I’ve used mine is to cut only enough Oramask for the task in hand. I never throw away cut-offs, surprisingly small pieces so often come in handy. Yesterday I cut two roundels, I used a piece of vinyl no more than 100mm x 50mm.
Good luck with your Cameo, you’ll love it and quickly realise just what an essential piece of kit it is!
-
2
-
-
Good news Albert! All part of the learning curve......been there, done that! 😄
-
2
-
-
I just use the standard blade supplied with the machine. What’s vital is not so much the blade type but the settings that you do just before you cut. I think your blade is set too deep, ie too much blade protruding from the holder, or your cutting with too much force. For Oramask 810 my blade is set to 2, force 5/6, one pass, speed 5. Hope this helps.
-
2
-
-
Good to see you here Ben, looking forward to your input into the “black art” of using Silhouette cutters! 😄
-
On 10/31/2020 at 10:45 AM, Kevin Futter said:
Great news, Al!
Kev
Agreed! Have fun Albert!
-
1
-
-
Yep, you’ve got it on one Greg, the cutter is very versatile beyond cutting vinyl. I’ve recently cut lead foil and ultra thin chrome foil. It’s just a matter of experimenting with the settings to get the right cut. Good to see you here.
-
 1
1
-
-
James, good question but you may be more likely to get an answer on somewhere like Britmodeller.
-
On 10/8/2020 at 8:45 PM, BlueNosers352nd said:
What Blade(s) should be looking at? Might pull the trigger this month.
The standard blade supplied with the machine is adequate for the vast majority of jobs. I bought the heavier duty blade for cutting thicker plastic but I haven't really tried it out properly yet.
-
1
-
1
-
-
8 hours ago, AlbertD said:
It's beautiful work like this that convinced me I need a Cameo machine. That Mustang is gorgeous.
Good to see you here Albert, you won't regret going down the Cameo route, it's the best modelling decision I ever made, and for more reasons other than just markings.
-
1
-


Hello from the Midlands
in Introductions
Posted
Morning Phil, good to see you here. As you’ll see from many people’s comments here, the Silhouette is a real game-changer when it comes to modelling potential. If you need any further advice please ask away and collectively we’ll do our best to help out.
Max