Leaderboard


Popular Content
Showing content with the highest reputation on 12/29/2023 in all areas
-
well, so to speak, I finally unpacked my Silhouette Portrait 3, downloaded and registered the device, searched for and watched several tutorials, but... to start with something simple, I would have decided to create my own masks for the spiral on the spinner and the individual number for the Yak-3 Special Hobby 1/32. I tried scanning the decal sheet and photographing it. I managed to import both files into the dedicated program, but apparently I can't detect the contours of the scanned copy. better with the one photographed, highlighting the contrasts. scanned one and .jpg I managed by trial and error to isolate the spiral and arrive at this point now I would like to join the main points of the curves, eliminating what is unnecessary and disturbing, but I can't find the right command (or sequence of commands). even getting just this far was quite frustrating, the tutorials I found didn't enlighten me, and the site manual doesn't go into detail, I think. Do you kindly have any more detailed tutorials or manuals? TIA, cheers, Paolo1 point
-
Paolo. Looks like you narrowed it down to a "somewhat useable" trace, but you could still use more refining by going back to your original image (not the isolated pieces you made), and using the Trace dialog options (Threshold, Despeckle, etc) to refine the trace. That would give you a single line trace vice the double lines you created. After the trace is made, you can reduce the number of nodes by using the Top Menu ... Object/Simplify (Ctrl+J) . Then, overlaying the trace on your original jpg, you can further refine the trace by adjusting the nodes and adding or deleting others to get something like this (can even be further refined) So here's the final trace (not scaled). Let me know if you'd like the Studio file. Sounds like a lot of effort, right? So .. One of the very best things you can do to use Studio effectively is to learn to use the drawing tools to trace. Takes an investment in time, but well worth the effort in the long run. The Studio Trace feature is getting better, but manual tracing is much easier, quicker, and more precise. 👍 Gene K1 point
-
I have a watch from local makers ZeroWest which contains some actual aluminium from ED825 AJ-T, so for that reason, that's the way I'm leaning. I gather from ZW that they commissioned an HK Lanc build for their shop, based on that airframe, from Spencer Pollard, so I must drop in sometime to have a look. There's some info here I did buy the HK Dambuster conversion to go with the original Border kit, in the hope that it would fit without too much faffing, so I'm torn as to whether I want to do a Dambuster version, or the original build. I am rather attracted to all those bombs in the standard version!1 point
-
I had exactly the same problem with Cricut Designspace. The ubiquitous RAF TTF file loads nicely in Word, but not in Cricut. As described, I typed out what I need in Word, then screengrabbed it, and saved as PNG. I actually converted it to SVG before importing into Cricut, but I think I could probably have taken it straight in. You should be able to scale from there. I'm preparing a Border Lanc build, so I'll be using masks for the lettering, rather than decals. Now to do some roundels!1 point
-
Thank you Mike! Cheers, Tom1 point
-
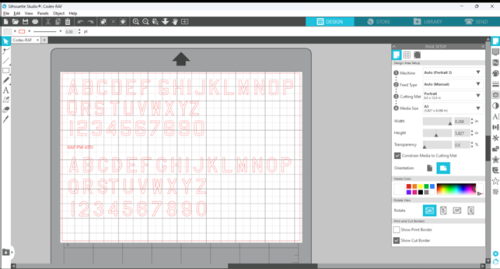
Version 1.0.0
61 downloads
I saw a thread on LSP recently, in which the OP described the difficulties with installing certain fonts, which are recognised by MS WOrd and other software, but not picked up by the Silhouette Studio software. The process the poster described was basically the one I used: Type up the lettering you want in MS Word, scan it in, and manipulate it until you have your codes in your studio 3 file. What a bother! But there is no way round it. However, the thread reminded me that I had created this file, but not uploaded it here. SO better late than never, here it is. It contains all the letters and numerals in two of the most common font styles used by RAF aircraft. You can use them for squadron codes, serial numbers, or whatever you choose. Just copy and past the characters you require into your own Studio 3 file, size them and arrange them to suit your subject, and off you go. Applicable to all scales - although the smallest I've managed to cut are the 4" characters that the RN use for serials in 1/32 scale. Hope this is useful.1 point