
Leaderboard


Popular Content
Showing content with the highest reputation on 08/03/2022 in all areas
-
I uploaded a file of Meteor roundels and walkways a little while ago. And here's the Meteor with the roundels painted - apologies for the "quick'n'dirty" photo. With hindsight, I would have traced and done the fin flash with the Silhouette as well; as it was, I used Tamiya tape and it was probably a lot more work. One more colour to do, ie black for the unit codes, serials and walkways. I'm doing VT112/XL-S of 226 OCU, a fighter training unit based at RAF Bentwaters in the immediate post-war years. (As an aside, they also operated a few Tempest IIs, and my SH example is earmarked for XL-Y.) Thanks for looking.1 point
-
I've done the nose of my Lightning this afternoon so recorded the masking sequence that I followed. This isn't the only way of doing it, there are shortcuts when transferring the mask to the transfer piece for instance but this is how I did this particular one today: Firstly I prepared an "empty" mask, a negative one if you like just to get its position right and to spray the background white areas ready for the roundel and the chequerboard: Then I took my transfer piece and placed it over the mask, carefully lifting it from its backing sheet onto the transfer piece. This is fiddly and needs care: The transfer piece/mask was placed over the "negative one", making sure all lined up as well as possible. Clear Frisket film makes this slightly easier but in this case I found the 6mm squares didn't stick well enough to the Frisket so moved out of alignment. Once in position the roundel centre mask and squares to be sprayed red were removed: When dry, the roundel centre mask was replaced using the register marks for accuracy. The mask for the white middle ring doesn't need to be touched. The outer ring mask is removed, this is the blue area. The chequerboards can simply be covered up with tape, no need to replace the squares individually. Then the blue is sprayed: When dry, all masks removed for the final reveal! I've never yet done chequerboards that don't need a bit of touching up: Hope this helps a little. Max1 point
-
This is a tale of what NOT to do! Designing and cutting the masks for the wing Balkenkreuz was straightforward but using them was not my finest hour! Let me say first of all that I got away with it, more by luck than judgement but boy, did I make life difficult for myself: Anybody with half a brain would have used an "empty" mask of the whole cross to spray a white background, then simply apply the four white L masks and spray black....voila, job done, easy peasy! But for reasons unbeknownst to me I applied the whole mask to the wing, left the "white Ls" in place and then sprayed black. This then entailed putting the fiddly narrow outer "Ls", four to each cross, back in place plus the large central cross, weeding out the "white section Ls" then spraying white. The margin for error was huge, the method was stupid, but the result was gratifying! Never again....think first! Max1 point
-
Those of you who are LSP members, or follow me on Facebook, may already be aware of this build, so my apologies for the double-up. I've now got it to the stage where I'm painting on some of the markings, and of course, cutting the required masks on the Silhouette Portrait! But first, a quick recap of the build to this point. The kit was given to me by a friend a couple of years ago, and I decided to mate it up with a parts kit that another friend had sent me a few years prior to that. This latter box contained most of an entire Hasegawa Mustang kit, along with an assortment of aftermarket items and some scratch-built modifications. I decided to treat both kits as one, and use whatever aftermarket I could find in the parts box, and use it in a build of the first kit. Hopefully that makes sense! But in spirit, I wanted this to be an out-of-box build - so no rescribing! So, I started with the Grand Phoenix resin cockpit set and instrument panel: I modified the tail wheel and fuselage mount to allow me to fit it at the end of the build: I used Moskit exhausts in place of the kit ones, and modified the engine so I could mount it onto a length of aluminium tubing, to assist with installing it into the fuselage: The tubing also now forms the prop shaft. Assembly from there was pretty straightforward: I removed the excessive bulges from the True Details tyres: The scheme I've chosen is "Butch Baby", which is one of the schemes Hasegawa provides in the newer of the two releases I have. This has red-and-yellow stripes on the spinner, and similarly-coloured chequers on the nose. I had a lot of trouble masking up the spinner, and I'll spare you the gory details, but I got there in the end: This brings us up to today's update: masking the nose chequers. In preparation for this step, I scanned the kit decals, prepped them in Photoshop, traced them in Silhouette Studio, and then cut them on the Silhouette Portrait: Note that I'll be using commercial masks for the national markings, and the kit decals for the aircraft name and any relevant stencils. If anybody wants a copy of the cut file, I can upload it here, but it's a bit wobbly in places, and probably needs to be re-drawn from scratch. I cut two copies so that I could test them on a mule, before I commit them to the final model. I forged on ahead with the chequers, however: SMS Red next: And unmasked: Not bad! But certainly not perfect. Oddly, the vinyl mask managed to lift off a divot of the yellow paint in one area, which I definitely was not expecting: What I was expecting, however, was that the vinyl masks wouldn't conform all that well around the chin intake area, and I was right about that: I'll re-mask this area with Tamiya tape and go over it, but since the red seems a little fragile, I'll be laying down a couple of gloss coats before I do. Overall, it's a little untidy, but definitely in the ball park. Hopefully for the next update I'll have it all tidy and masked up ready for the main paint job. Kev1 point
-
Thanks, fellas! I've done the touch-ups now, and given the area another gloss coat for protection. I couldn't resist posing the prop in place for effect: Kev1 point
-
FINISHED!! This one seems to have fought me most of the way: perhaps that's my fault, perhaps the kit, perhaps a bit of both. But here it is, warts'n'all, and I'm now rather pleased with it: it's been a useful learning experience from the masking point of view, not least the checks. I'll do some proper RFI shots in due course, but meanwhile, here's some "taster" pics: A small touch of artistic licence: I'm not one of those who insist that all invasion stripes painted in the days before D-Day were scruffy ("hobby-horse" alert!!), but the black straying up the aerial was deliberate on my part. The other stray black on the stripe behind wasn't, but I decided to leave it anyway. Did you wonder "Will it ever be finished"? I know I did. Thanks for staying with me, and for all the encouraging remarks along the way.1 point
-
Suddenly it's coming together and starting to look as it should. Today I matted down the nose checks and redid the anti-glare panel which had suffered some overspray at some point. Then I added Capt Johnson's scoreboard using a Kits World set of generic kill markings; mended the tailwheel which broke earlier in the build (but nothing superglue and a pin couldn't fix); removed the windscreen masks plus the kit canopy which was being used to mask the cockpit (so it wasn't completely useless after all ); and added the Quickboost exhausts. Sometimes you just get one of those kits that fight you all the way, but (touch wood) it's very nearly the last lap!1 point
-
I'm back. Funny thing, I failed to get this over the line in the GB on LSP, so a lot of pressure was off and I felt I wanted to get back to it. I've been doing the nose masking and painting. In the end I applied all the checks individually, one by one, then removed the pieces where the red was going to go. It was a slow process, but in the end I felt it was the best way to align them correctly. I was quite gratified by the way they fitted: all those endless test cuts/fittings with paper paid off. Btw, that purple stuff is liquid mask. And although I picked up a pot of Tamiya gloss red by mistake (the gloss and matt are X7 and XF7 respectively), I was reasonably happy with the result - nothing a coat of matt varnish won't fix. There were several areas where the small masks were not quite tacked down properly, so a bit of delicate brush-work was needed on some squares. Still by no means perfect, but as always the camera magnifies any errors: it looks a lot better in real life than it does here (honest!). So in the interests of finishing this bird (and the interests of my sanity) I'm going to accept it as is.1 point
-
Thanks Max. The first job was to unmask the white I painted earlier, and mask behind it, then do a topcoat of white. Don't worry, there is a band of Artool Ultramask in front of the Tamiya tape. The next job will be masking out the checks to be left white. I'm not sure how I'm going to tackle that other than one check at a time, but perhaps I'll think of something: any suggestions welcome. I have two masks for the checks, each one for half the nose. I'm dubious about trying to pick up a whole set in one go, I tried it earlier and it didn't go well as the transfer tape didn't pick up a complete set. Incidentally, for once I'm a little disappointed I did a good job on the upper nose seam: I'll need to identify the centreline of the fuselage, and even a trace of a seam would have been helpful.1 point
-
Anyway, no problems with the wording on the nose art. Though I say it myself, that doesn't look far out. http://www.littlefriends.co.uk/wp-content/groupimages/gallery/339g/6n-j1.jpg The last major painting job is the chequered nose band, and I'm going to rest it a day of three before tackling that. Thanks for all the kind words and encouragement so far.1 point
-
This is a great thread Mike! It’s so easy to get the impression with a finished model that all went supremely, faultlessly well. I’ve never achieved it, and I applaud you for showing the common “whoopsies” that can occur during the masking/painting process. Max1 point
-
Some more progress: slow but steady, and occasionally some negative progress. The learning point from this is that when masking with lots of tape, make sure the boundaries between pieces of tape are complete, the tape is overlapped and fully stuck down. Next learning point: the bomb/tank racks remained natural metal so I should've left them off until after painting. And I thought that after 50+ years I was starting to get the hang of this modelling lark! A few scratches on the "6" to sort out! So I sorted that lot out, and painted the bits of the flap that hide under the wing skin when they're up, and after letting it all cure, masked up for the insignia blue. Then painted that, and did the first part of the nose art.1 point
-
Thank you Gene, glad you're enjoying it. I'll have a look at doing that, but I'm not sure how, so bear with me while I work that out.1 point
-
Thanks Gents. Although for full disclosure I should mention that I've used drawing software before, not least Powerpoint (now-fading memories of work!!!) and even dabbled in a CAD package (again, that was for work), so it's more getting used to the particular wrinkles of the Silhouette software than coming at it ab initio.1 point
-
I've now set up the Works in Progress forum, and moved this thread into it as the very first entry! I'll let you guys read all about it in the Rules of the Road post. Kev1 point
-
And finished. I'll do some proper photos in due course. It just fits in the IKEA display cabinet: turn it port quarter to the front and the door causes the pitot to bend a little.1 point
-
When you use decals, you can see the model gradually, slowly evolving - hopefully into what you'd envisaged - as you work. The gratifying thing about using the masks is that it's a bit quicker: you add lots of masking and do a bit of painting, and nothing seems to happen Then suddenly, seemingly in an instant, the masks come off, et voila! OK, the walkway lines are a little uneven in width, but I can live with that. What I can't live with (although I did seriously consider it) is that the starboard "S" is noticeably above where it should be. I've no idea how that happened, I blame the bench gremlins. Now I'm particularly glad I included a spare on the mask sheet. So not 10 minutes after the big reveal, it was out with a fine sanding stick, off with the "S", and a quick touch-up of the silver; the new S goes on next session when the touch-up's cured.1 point
-
Version 1.0.0
74 downloads
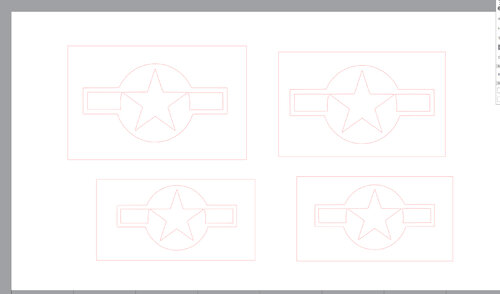
these are for revell mustang but could be used for the tamiya traced off off of the cutting edge decals for Fernesi1 point -
usaf mustang stars View File these are for revell mustang but could be used for the tamiya traced off off of the cutting edge decals for Fernesi Submitter dashotgun Submitted 02/14/2021 Category U.S. - WW21 point
-
I think that the issue with the red edges to the white segments is bleed. Either capillary action along the joins or down the joins. Three possible solutions: After placing the white area masks put a thin skim of white down to seal the edges and joins (may result in white edges to the red though) Make sure that you do not put a wet coat on (in this case the red) Mask the joins where the add in masks mate with the base mask (tape or masking liguid)1 point
-
Thanks for the tutorial, Max. The results look great! Kev1 point
-
Indeed, that seems to be the only way Max. But it's slow. However, I'm afraid there comes a time when a model can turn into a bit of a chore rather than a pleasure, and that time has been reached with this: I never thought I'd get there with a Mustang, but here I am. So I'm shelving this for a little while, and switching to something else for the moment. But the Comet will be back eventually.0 points
